In this module you will be able to create, upload, see and manage your shipments, all in one place. Here you can see the list of your shipments and know where your cargo is, by clicking on the Pins on the map, and you will know the status and phases of this.
STANDARD SHIPMENTS
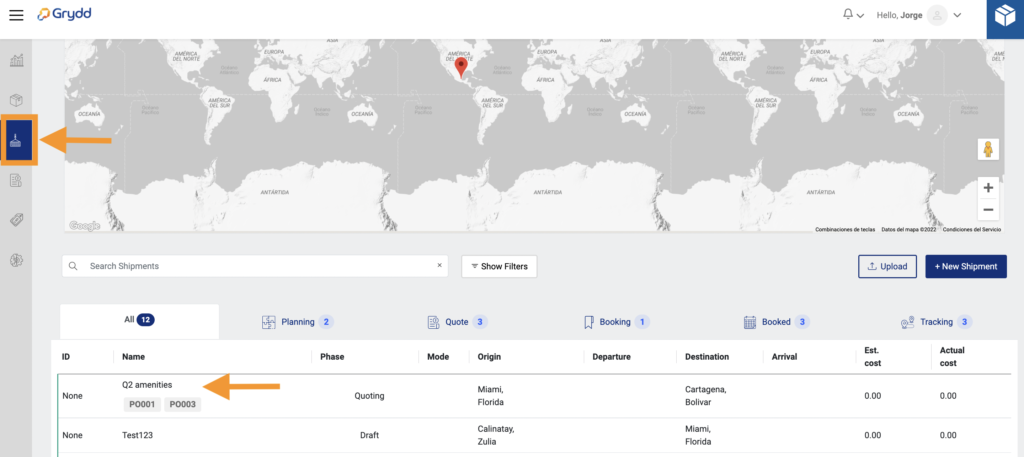
To get into this module you need to click on the left menu of your screen and select “Shipments”.
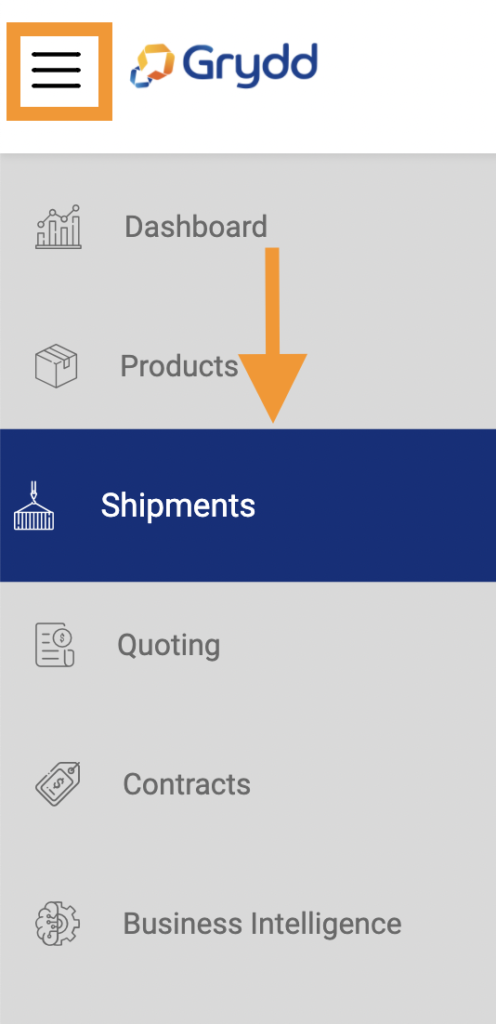
- When you get in the main view you are going to see a general map, in this map later you will see Pins that will show you the exact position of your cargo.
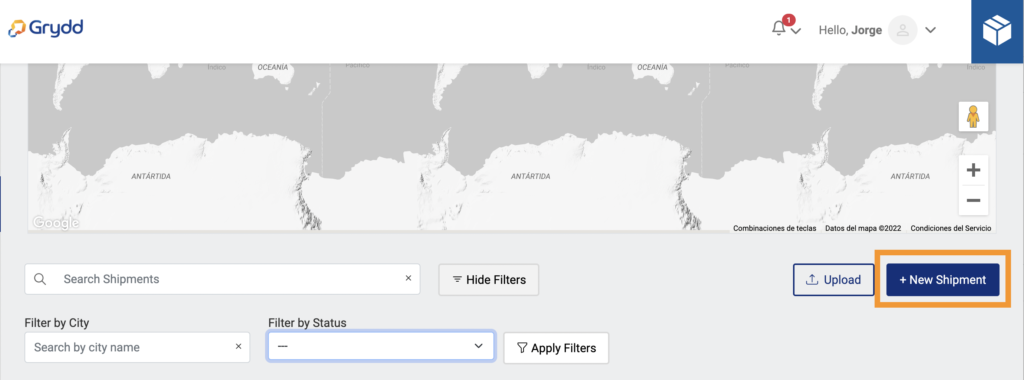
- After scrolling down, you will also see a search bar for you to search your shipments by the name then click on the Lens icon to see the results.
- You can also use the filters to have a specific result, applying filters by City or by Status

Now, let’s get started! Click on the button + New Shipment and the system will automatically take you to a new view where you will see 3 options.
Choose the option Standard Shipment, and the system will take you to the next screen.
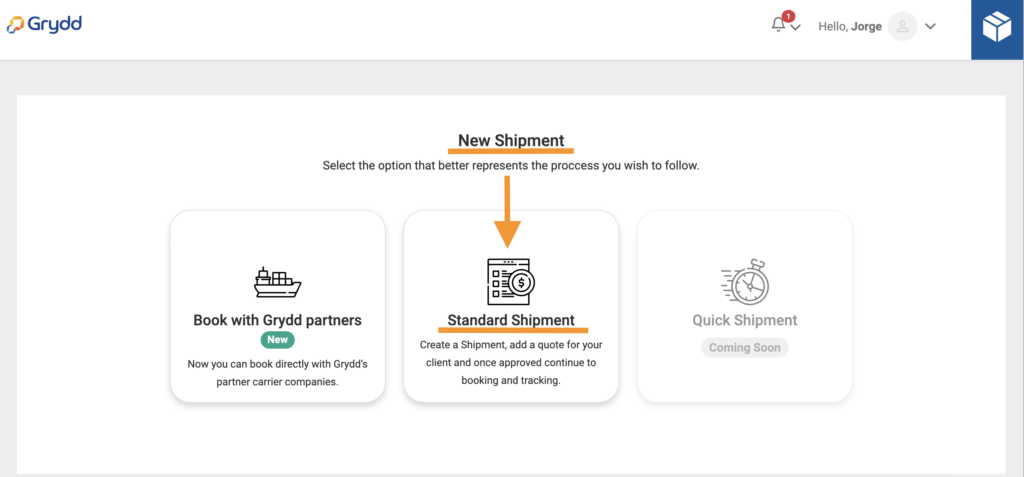
In this view you will go through 3 steps: Parameters, Products and containers, and Review.
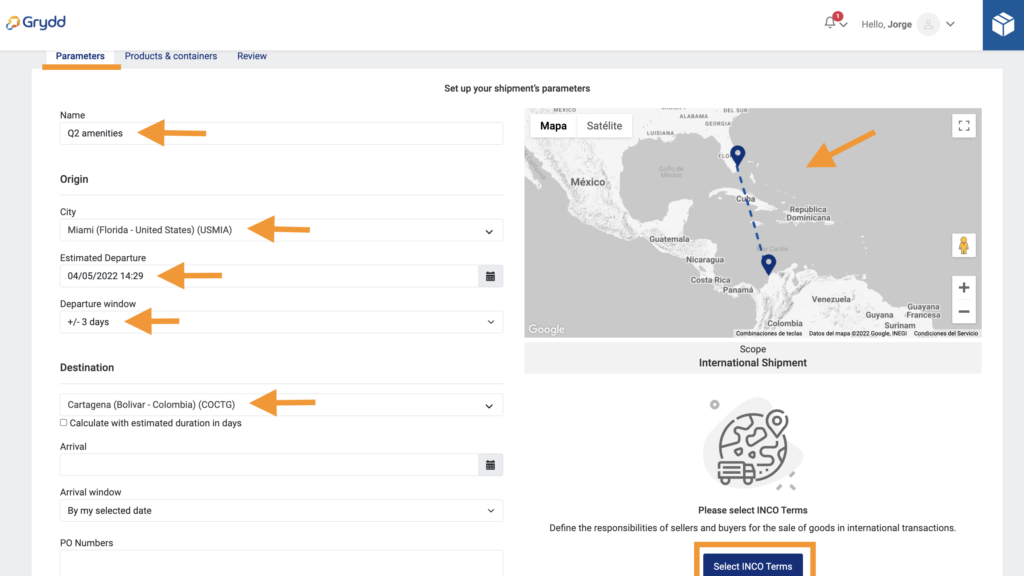
1. Parameters
In the first view “Parameters” you will add all the initial information for your shipment.
- Add a name for your shipment (for you to easily identify).
- Choose an Origin city from the list.
- Select the date of Estimated departure, click on the calendar icon, and pick a date.
- Select a departure window, the options are (By my selected date, +/- 3 days, +/- one week, +/- 2 weeks, +/- one month), this mean that the date you choose can be flexible about the departure of your shipment.
- Choose a port of destination from the list
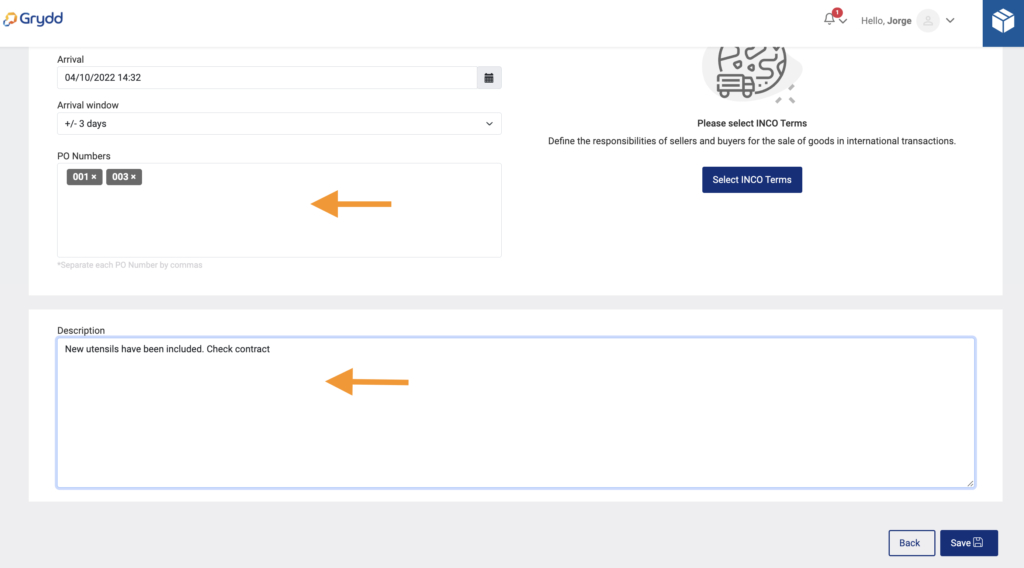
Keep scrolling down
- Add PO numbers if you already have them, if not you can add them later.
- Add a description of your cargo (this is optional).
- Once everything is filled, click on Save at the bottom and the system will lead you to the next view.
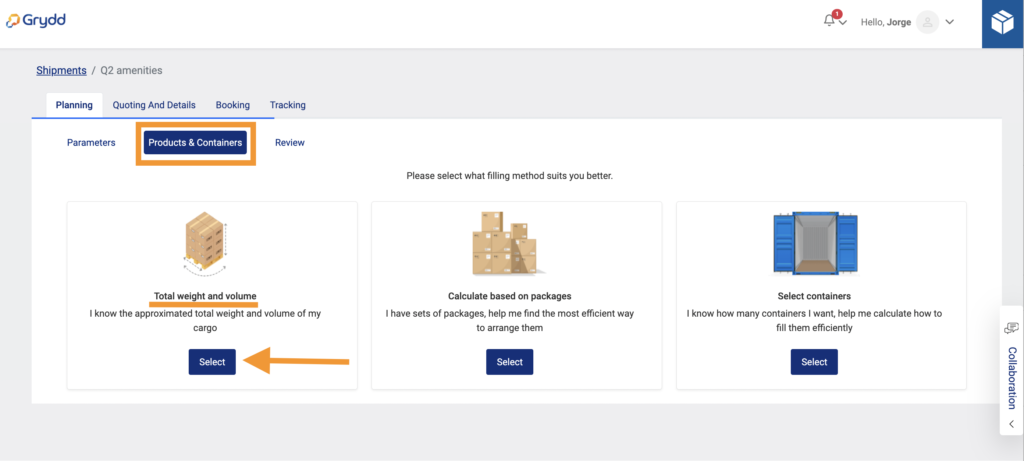
2. Products and Containers
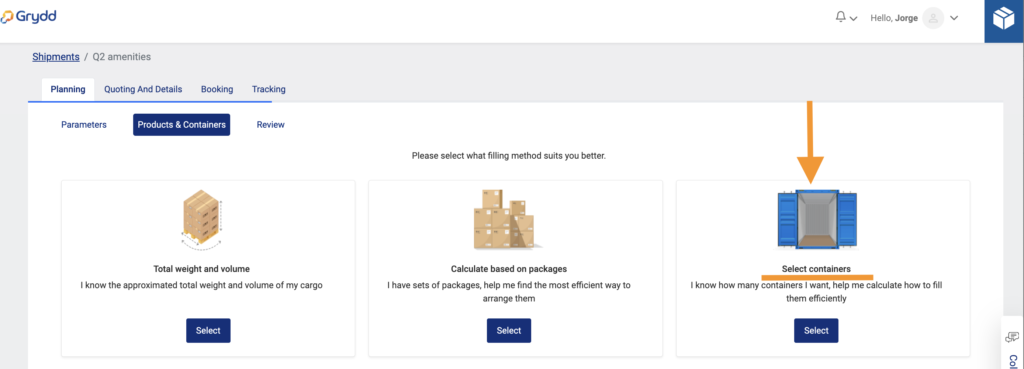
In this view you are going to see 3 different filling methods, select the one that suits you better.
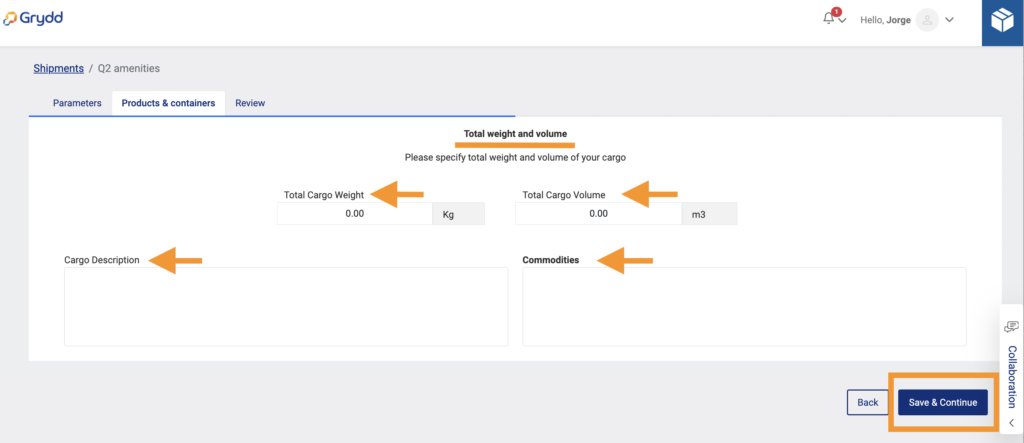
Example 1: Total weight and Volume.
- The system will take you to a new view where you need to add the total cargo weight, total cargo volume, cargo description and select commodities that apply for your cargo.
- Once is ready, click on Save and continue.
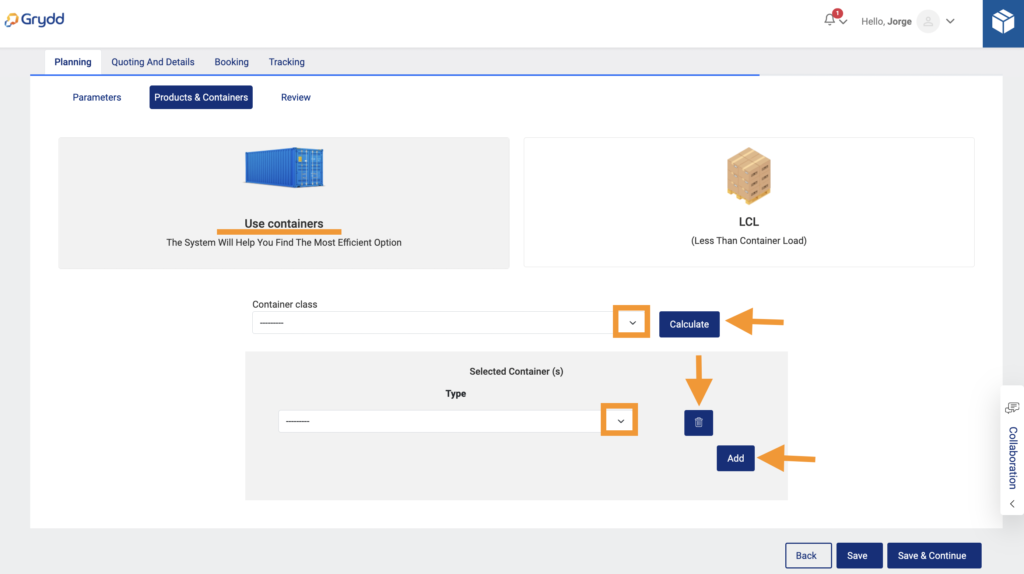
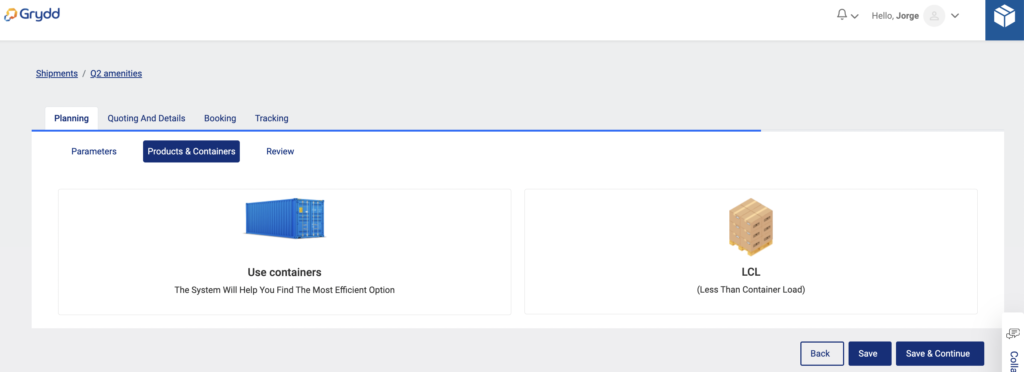
- In this view you can select use containers, and the system will help you to find the most efficient option.
- Select a container class from the list.
- Select a type of container from the list. If you need more containers click on “Add”.
- If you are ready, click on “calculate”.
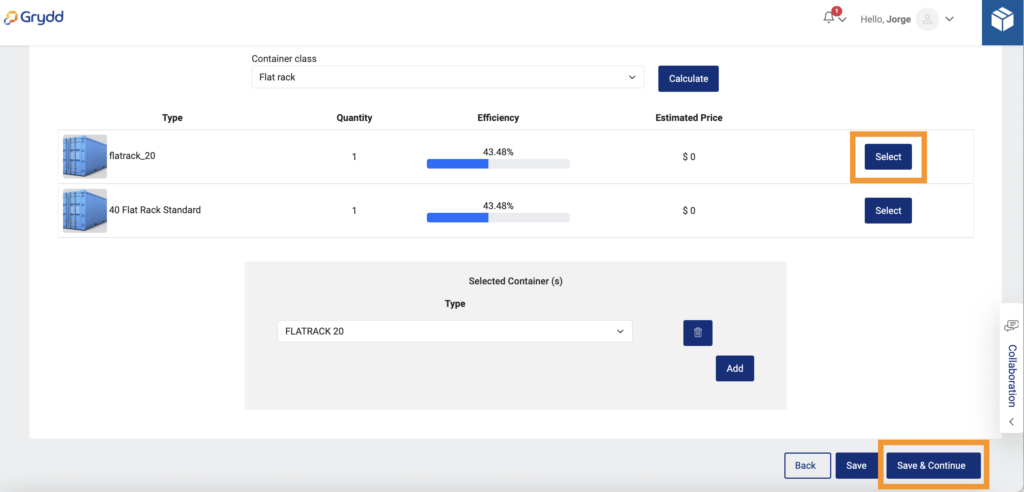
The system will show you a list of containers according to the one you chose. And you will see the type, quantity, efficiency, estimated price and the button select.
- Select the one you want and click on save and continue at the bottom.
- Once you click on save and continue, the system will take you to the Review screen.
3. Review
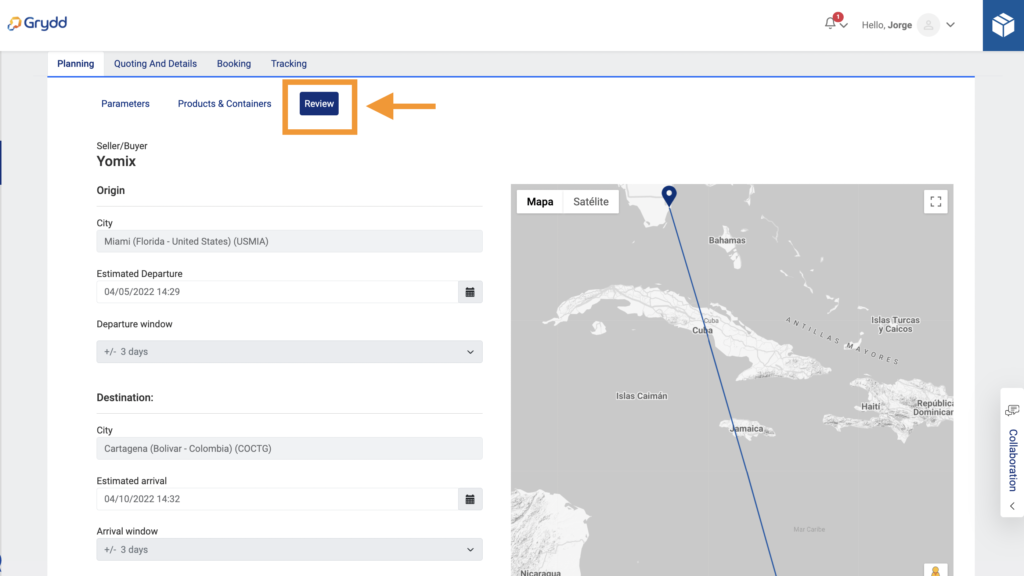
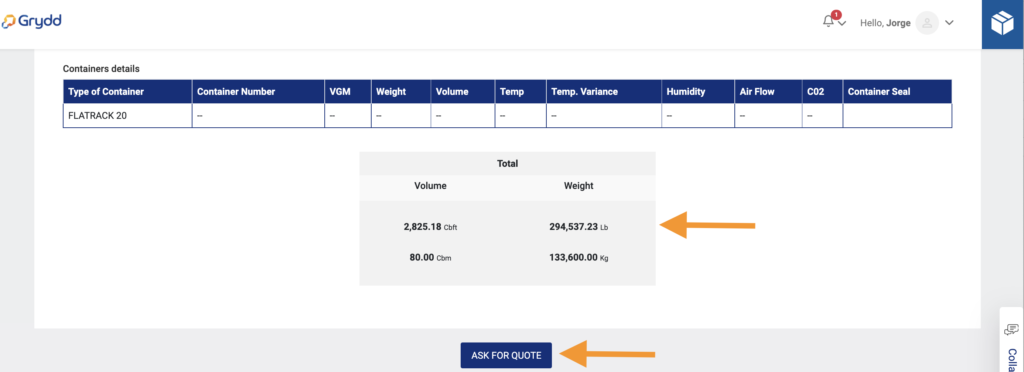
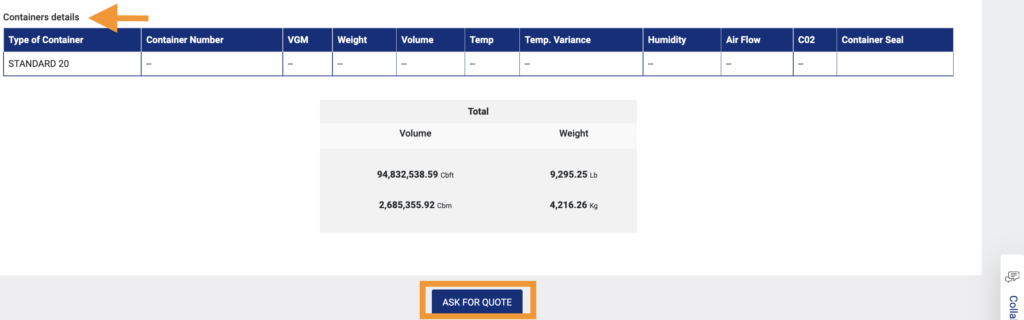
- You will see the container you chose and later your operator logistic will be able to add more information.
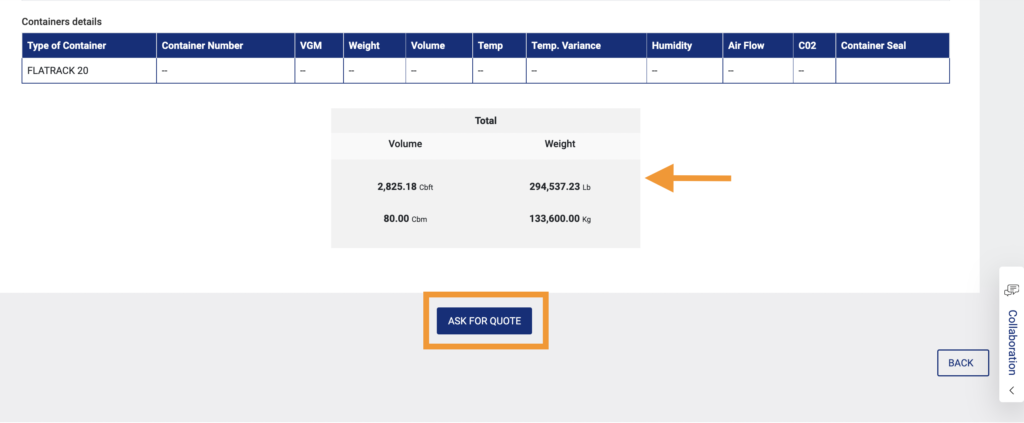
- Once you scroll down and review all the information, click on “ASK FOR QUOTE”.
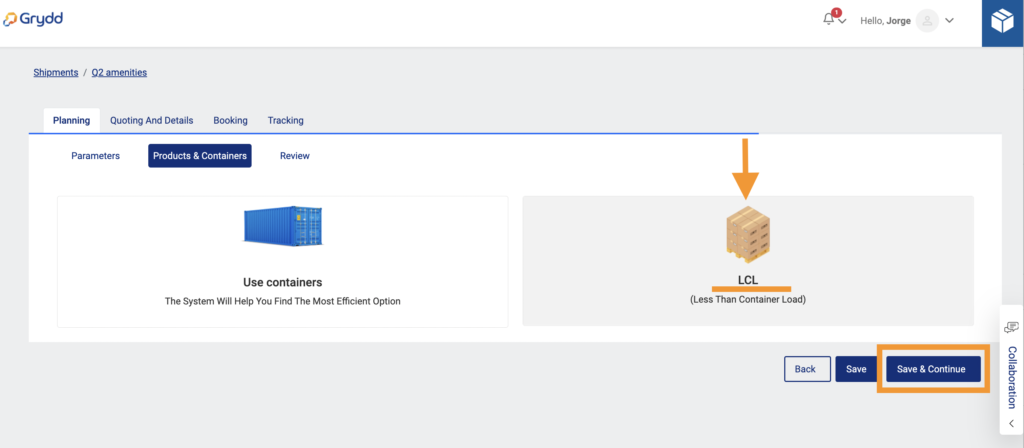
Let’s go back a couple of steps to consider if you choose LCL (Less than Container Load) instead of Use Container
Now, if you choose, LCL (Less than container load), click on save and continue and the system will take you to the review screen and follow the same steps above.
The system will show you only the total weight and volume information at the review for this option.
Example 2: Calculate based on packages
Lets go some steps back and try other option by calculating based on packages:
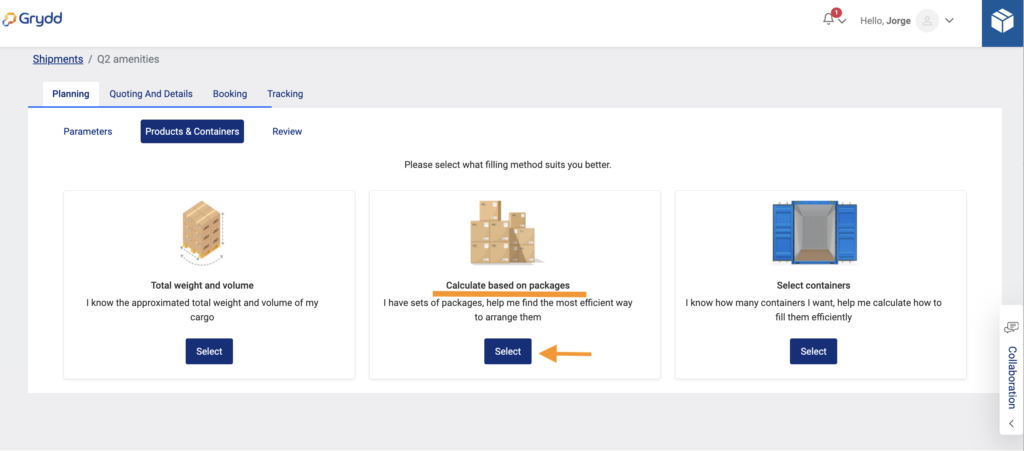
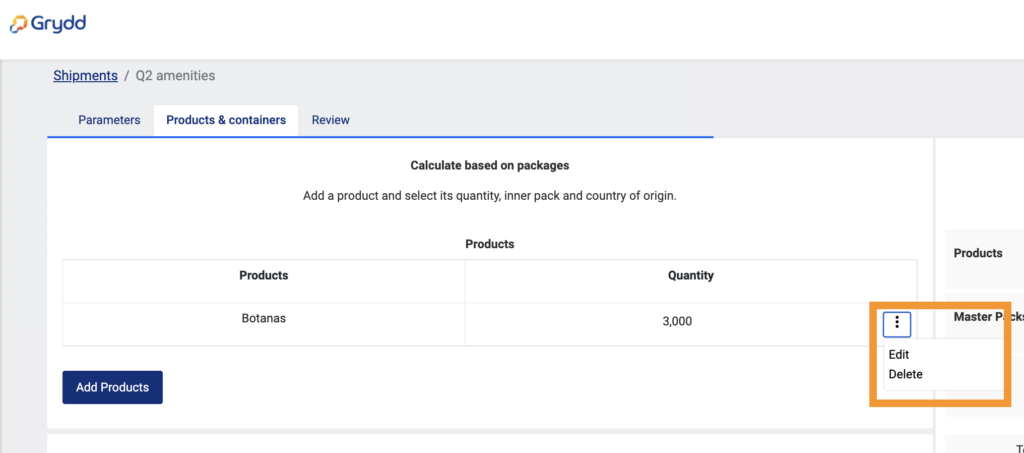
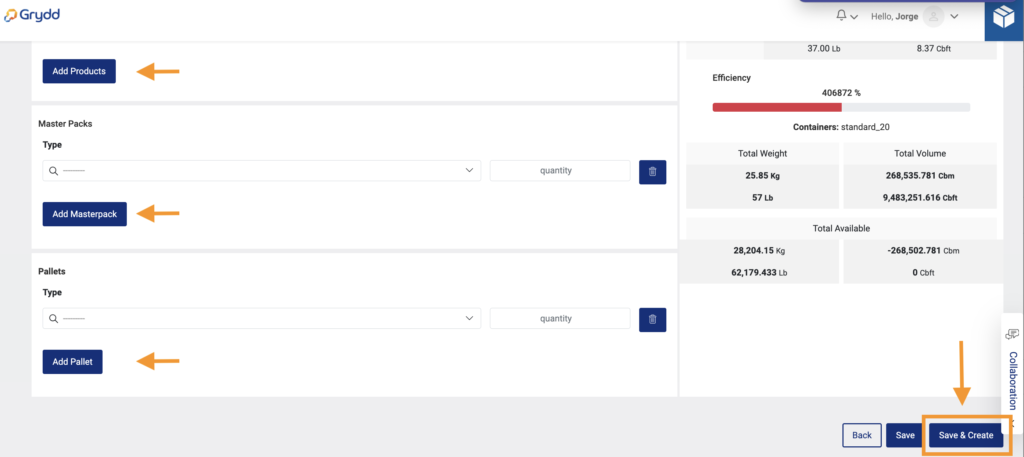
You will see a new view where you can add your products, master packs, and pallets.
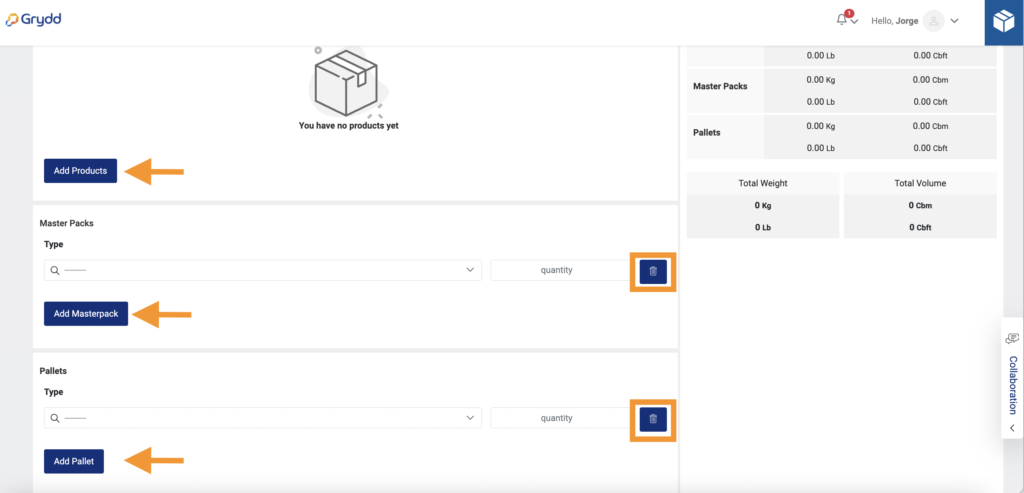
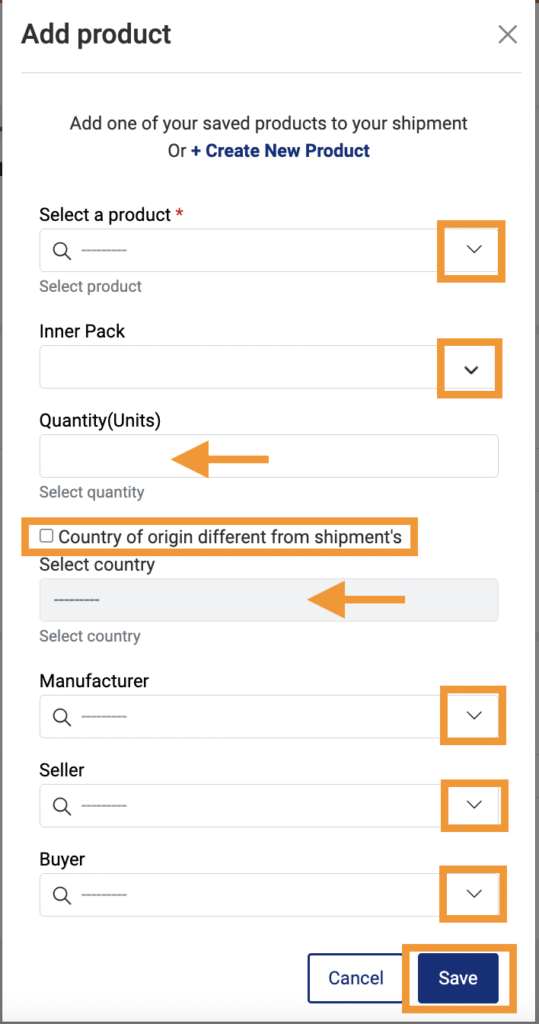
- When you click on the button “Add Products” a modal will open.
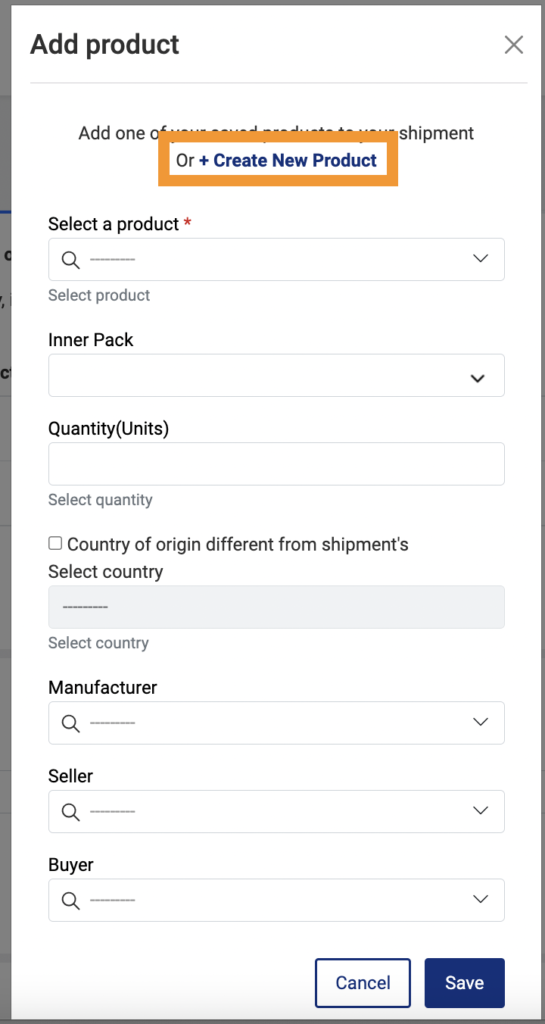
- Select a product from the list. (Here will appear the products you already created in the products module).
- Select an Inner pack from the list.
- Add the units you will send.
- If the origin of the product is from another country, please click on the check box and select the country.
- Add manufacturer, seller, and buyer if it applies. If not, select Save.
After creating the product and adding it’s information, you can click on the three dots and you will be able to edit or delete the product.
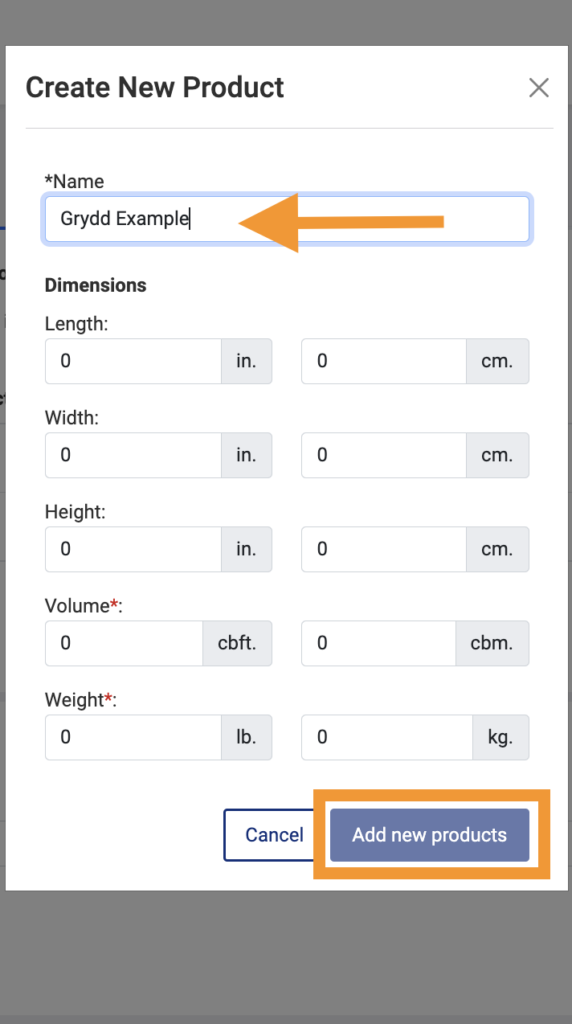
You can also select “Create New Product”, the system will open a modal, add a product name, the dimensions of your product and click on “Add new products”.
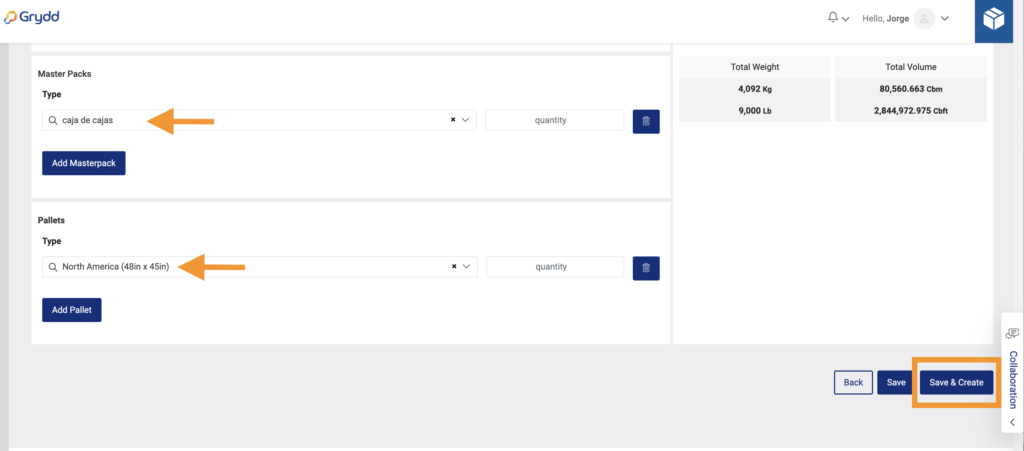
Once your product, master pack and pallets are added, click on save and create.
The system will take you to this view, follow the same steps above until you get to the review screen.
Example 3: Select Containers
Let’s go back again and select the “Select Containers” option that works great if you know how many containers you want, and the system will help you calculate how to fill them efficiently.
- The system will show you a new view, where you can select the type of container you want, and on your right, you can see the capacity for that container.
- If you want to add another container, click on “Add”, then save and continue.

- You will see a new view where you can add your products, master packs, and pallets.
- Follow the instructions above explained in Example 2 until you get to the review screen.
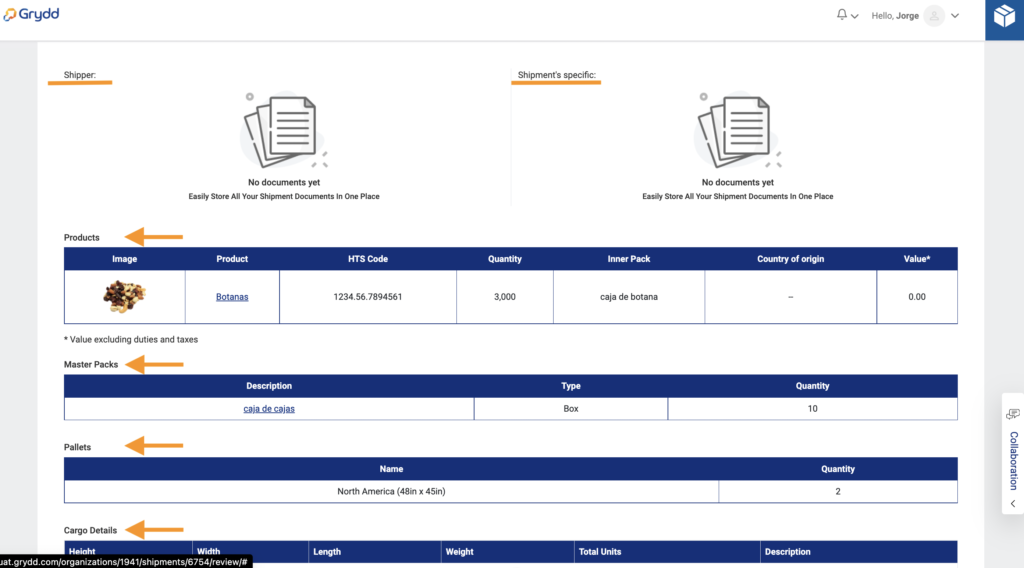
Once you are in the review screen, make sure all the information is correct.

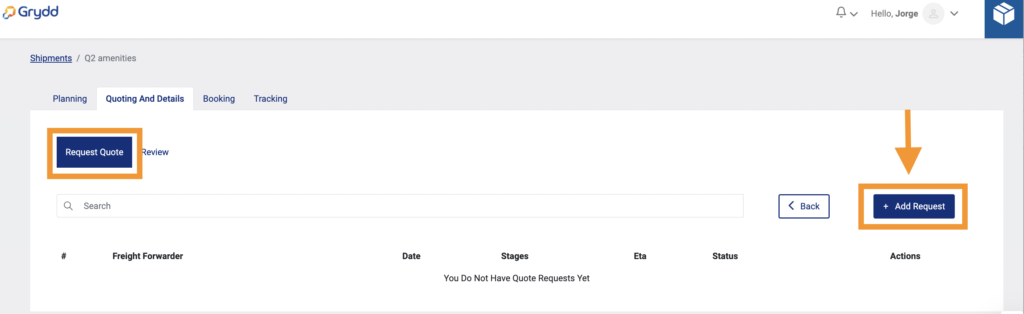
When you are sure, click on ASK FOR QUOTE, and the system will show you a new view.
Click on the button “+ Add request”.
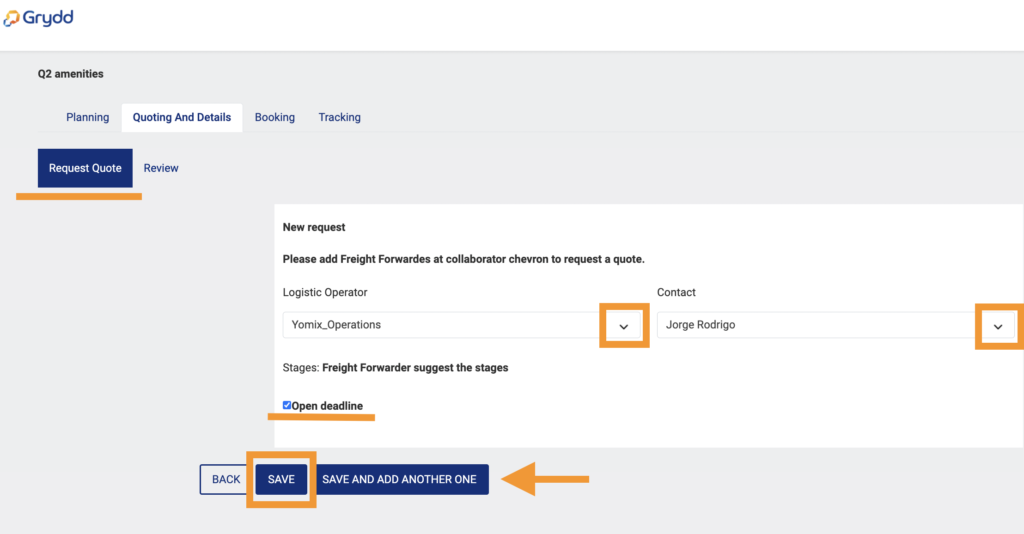
- Then select from the list the Logistic Operator you prefer, select a contact, and click on Save.
- If you need to add another logistic Operator, then click on Save and add another one.
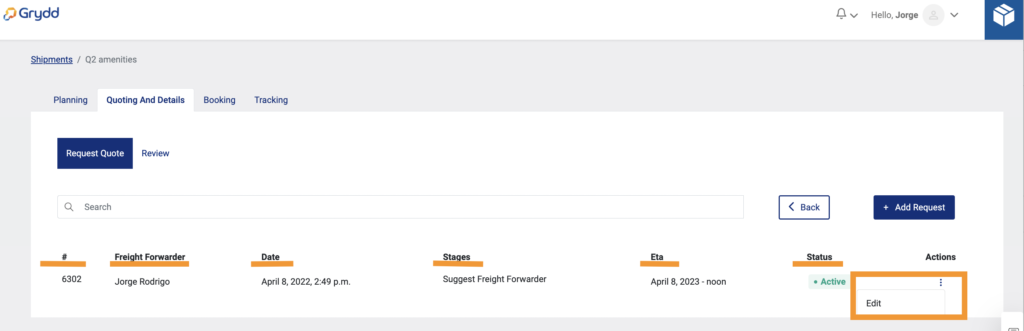
- When you saved, the request will be sent to the Logistic Operator you chose, and you will see a list like this.
- You can also edit it, if you want to change the Logistic Operator before the manual quote is started.
When the quote is ready, the Logistic Operator will receive a notification in Grydd and consequently create the quote and send it to you for approval.
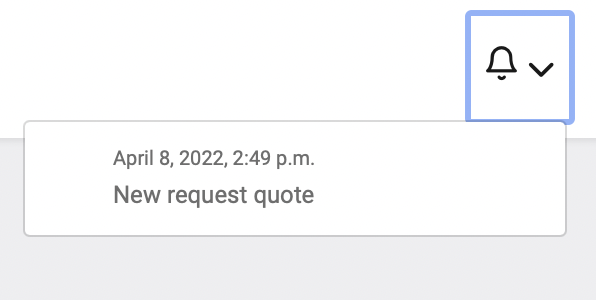
In the Shipment module you will receive a notification of the new quote sent by the Logistic Operator.
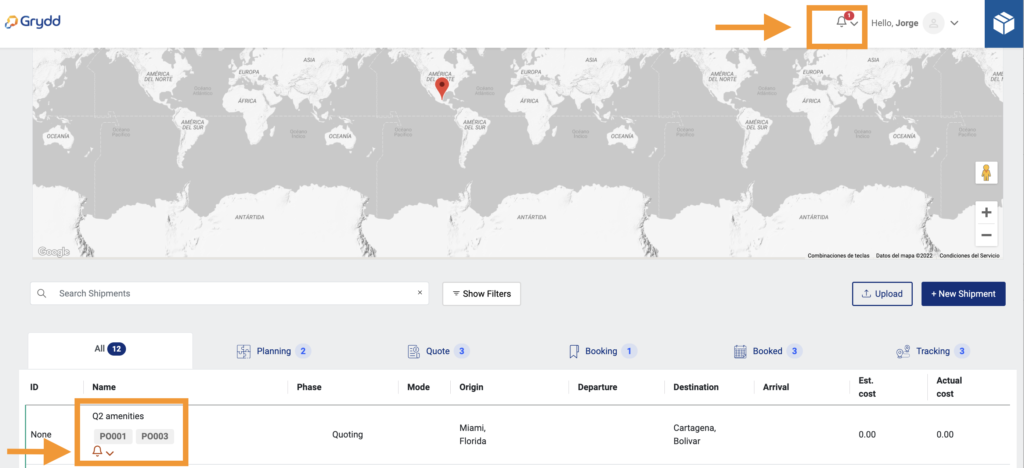
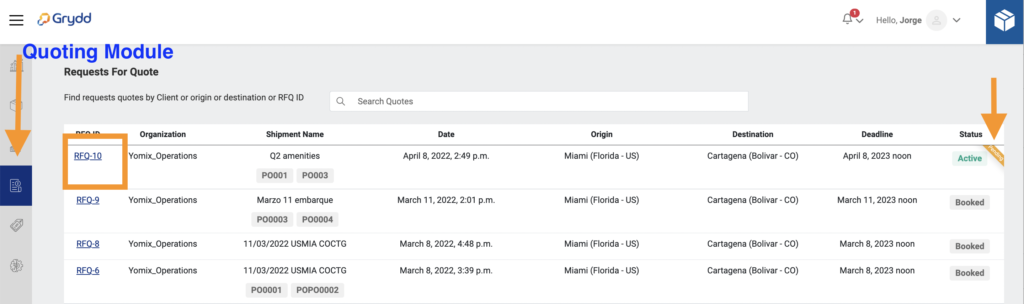
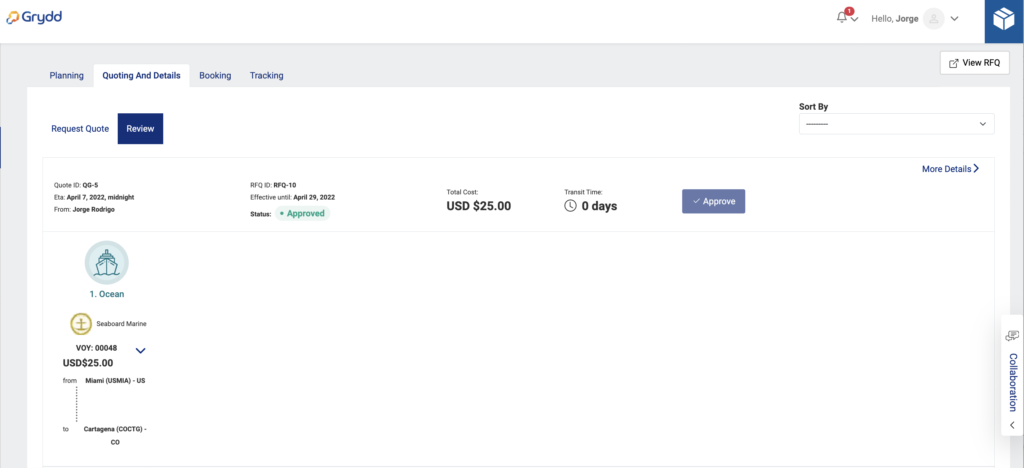
- Nevertheless, you will see the new quote in the Quoting module and also receive a notification, where you can find a list with all your requests and the statuses they have.
- Click on the RFQ ID or on the Organization’s name and it will show you a resume of your quote.
This is the resume of your quote, you can click on approve if you agree or dismiss if you are not, if you disagree then click on the button Customized quote to ask for a new quote.
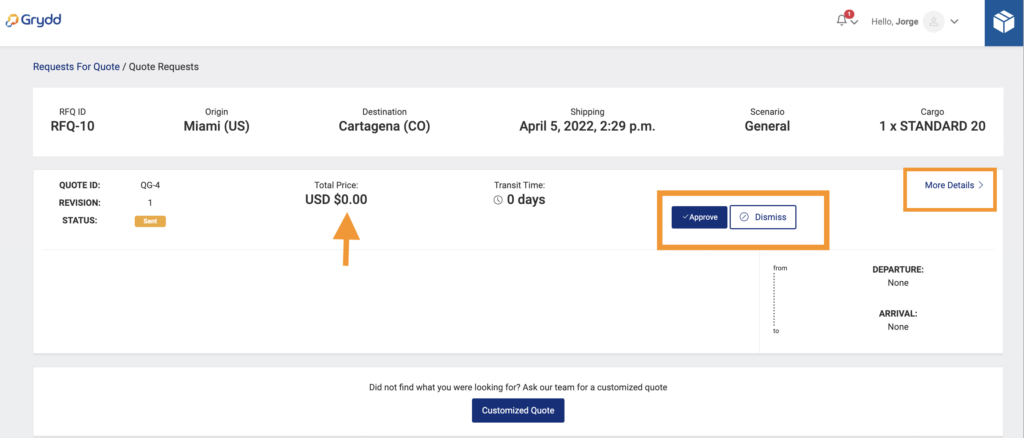
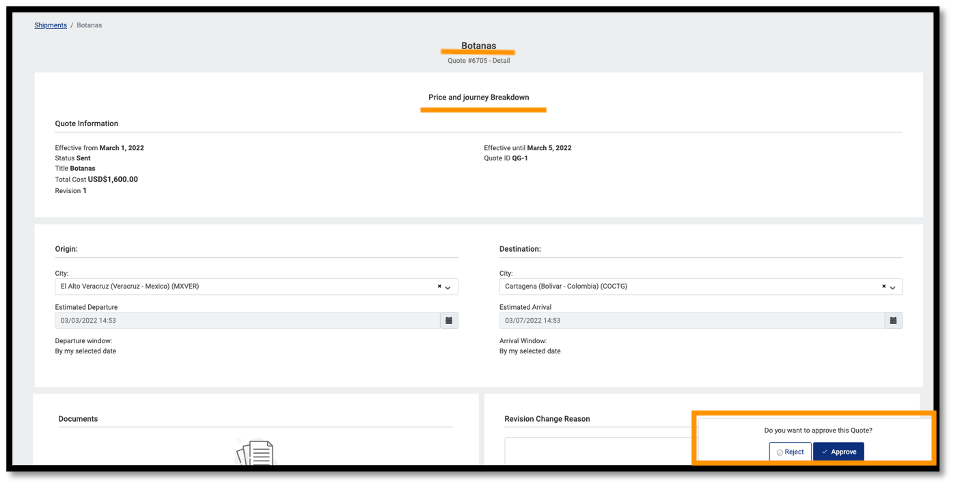
- If you click on More Details, you will see a better resume with all the details.
- And at the bottom of the resume, you can reject or approve it.
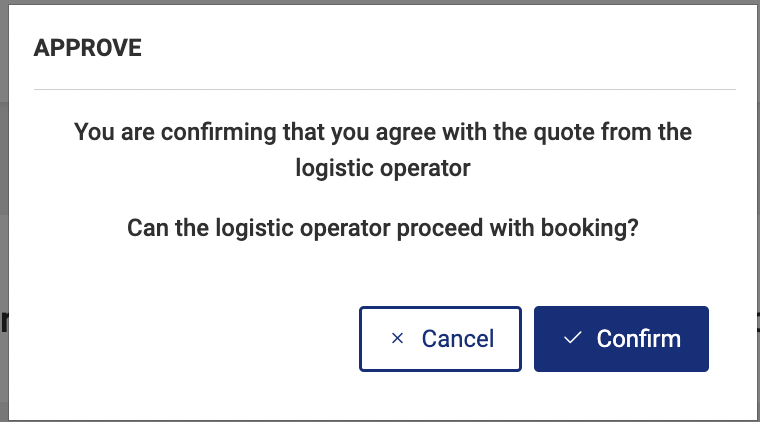
When you click on Approve, a modal will open, and you need to click on confirm.
Once the quote is approved, the Logistic Operator will do the rest of the process.
And you will see it like this.
And you can now go to the shipments module and see the status of your shipment by clicking on the name of your shipments.
The system will take you to the booking view. Here you will be able to see all the information of your shipment.
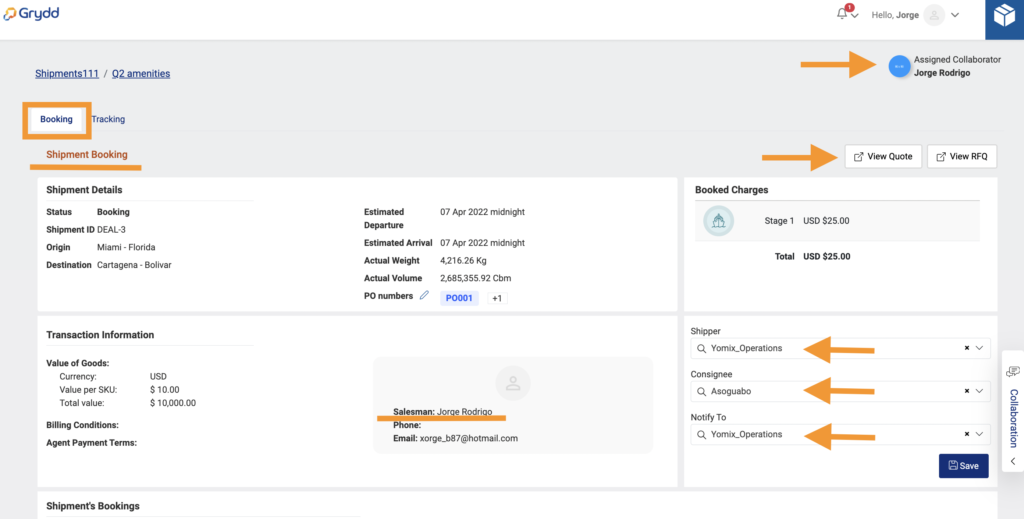
- When you get to the tittle Shipment’s Bookings, you will see a booking Id that the system generated automatically.
- You will see a status: Request, pending or confirmed.
- And you will see a Booking number also generated automatically by the system.
- If you want to see more, click on the arrow on the right.

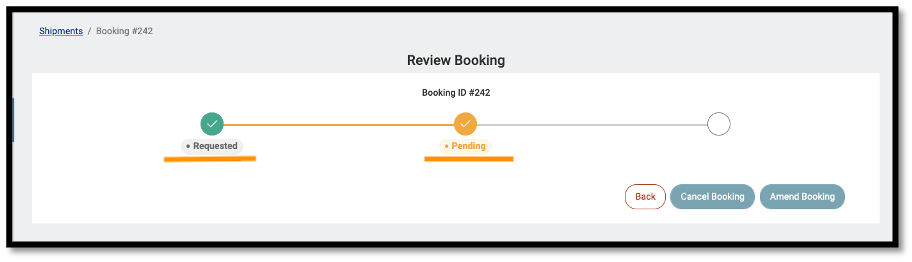
- You will see the Booking review, and in which step the process is.
- Once the Booking is completed. The two buttons “Cancel Booking” and “Amend Booking” will be activated” and you will be able to use them.
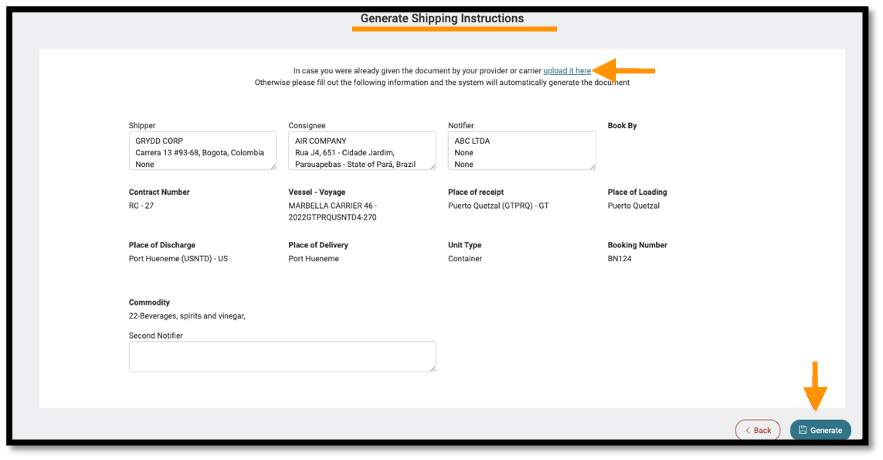
Now you are going to see a section where you will find a document called Shipment Instructions. Click on New document and fill the information.

Here is an example:
Example of Shipment Instructions
Fill the fields that are in blank and the click on “Generate”. If you already have the document, then click on the tittle “upload it here” and that is all. The document will be added immediately.
This is the form:
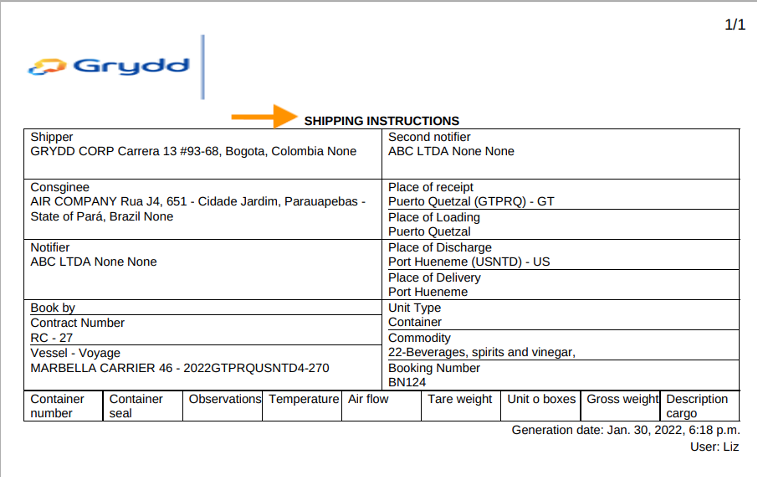
This is the document:
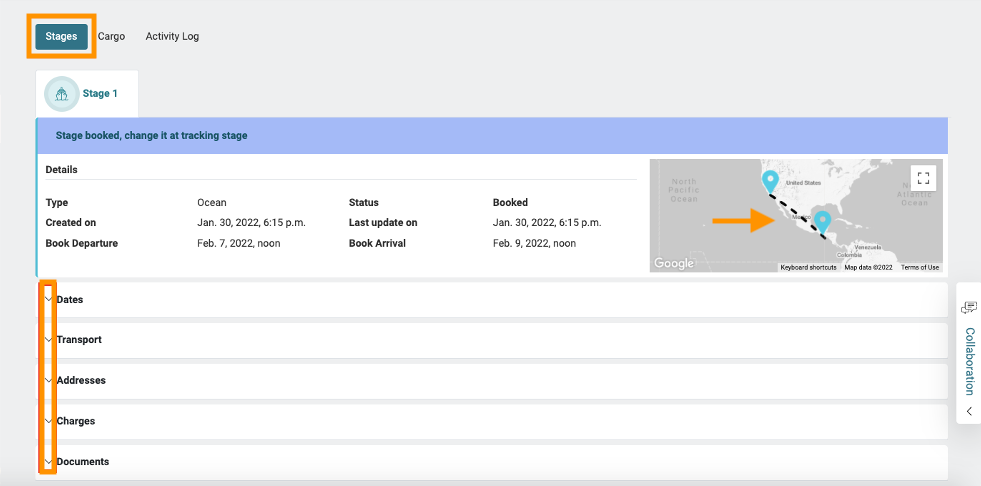
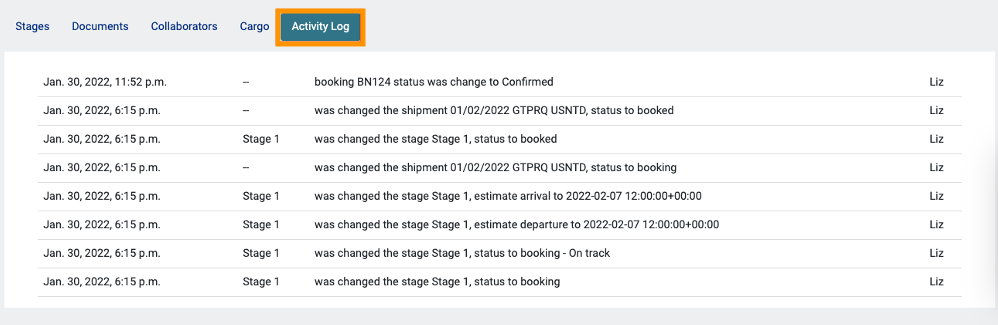
– Then you will find 3 tabs: Stages, Cargo and Activity Log.
Stages will show you all the stages your shipment has, with all the information about it. Dates, Transport, Addresses, Charges and Documents.
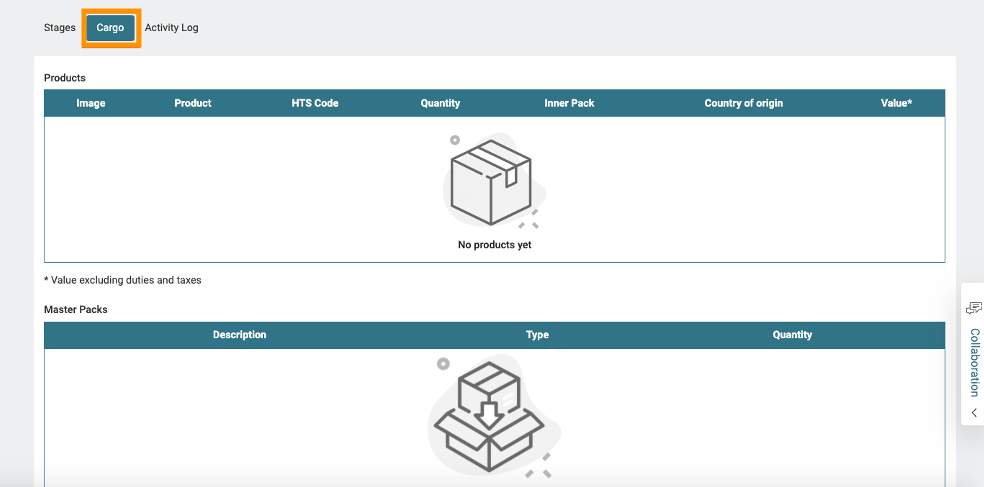
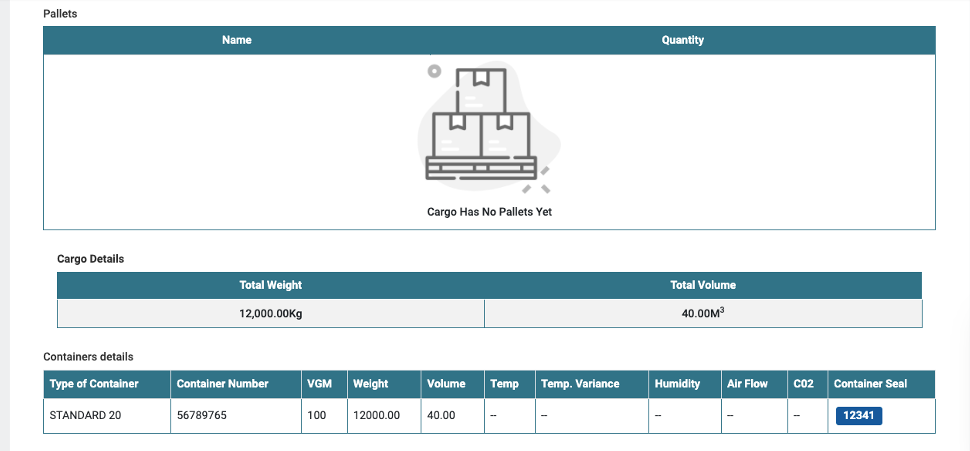
In Cargo you will see Products related with that specific shipment, Master Packs, Pallets, Cargo Details, Container Details, and the Total.
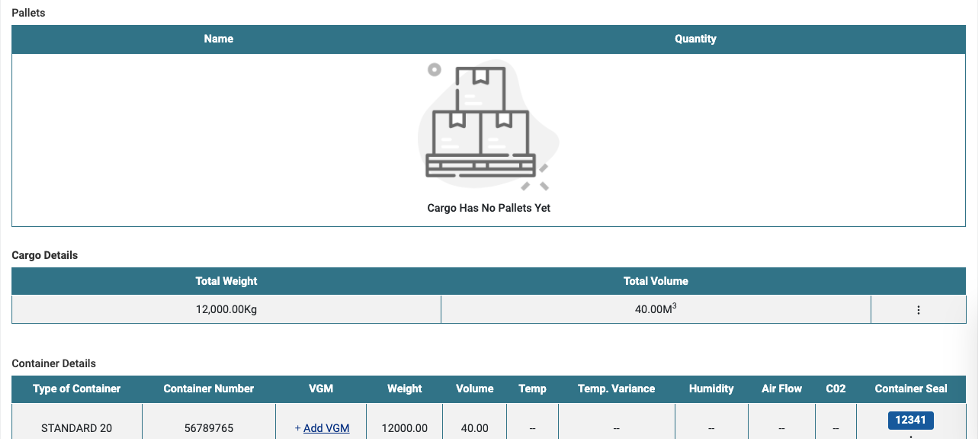
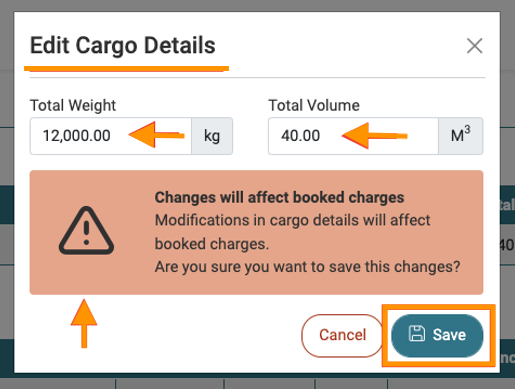
In Cargo Details, you have the option to Edit the Total weight And Total Volume.

Click on Edit Details and a modal will open. Do the changes you need and click on Save.
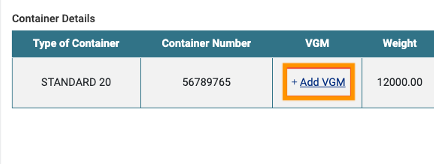
On the Container Details, you also have the option to add the VGM by clicking on the tittle.
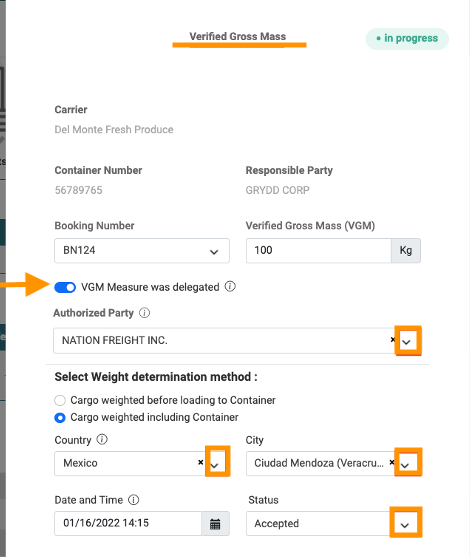
A modal will open, and you can add all the information.
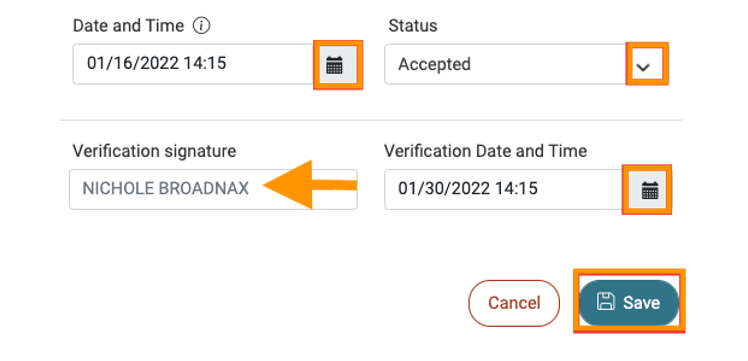
And when is completed, it will look like this.

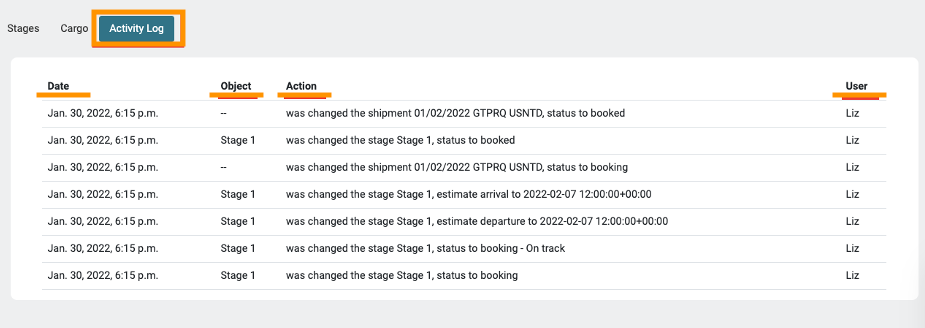
In Activity Log you will see the record of every change or update that the users related with this shipment make.
Once the status of your Booking is confirmed, you will see that the system generates an automatically Booking number.

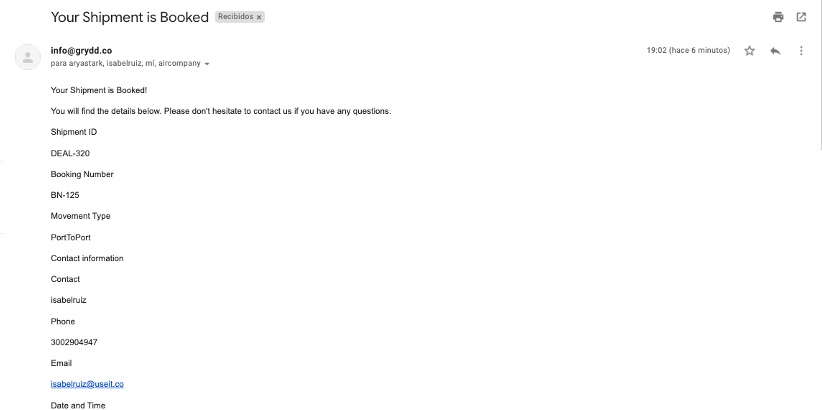
You will receive an email with the booking information.

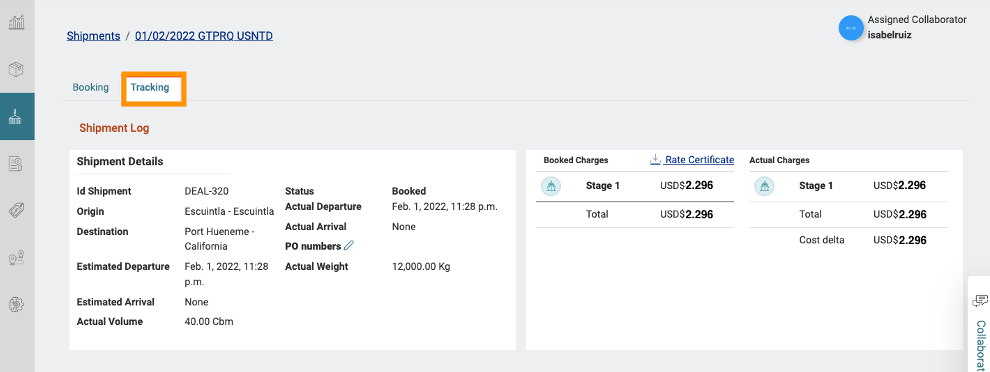
- Once your booking is completed, you can go to the next view “Tracking”.
- Here you will find all the information of your shipment. Dates, IDs, Route, Cargo, Containers, assigned collaborator, charges, Documents, Collaborators for the whole shipment and Activity.
Stages
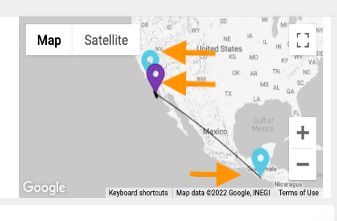
- You will see the route information and a map on the right that once the shipment is in transit the system will show you pins on the map to see where the vessel is.
- Once the stage is launched, in the map you can see the route (blue pins, origin, and destination) and the purple pin is the position of the ship.
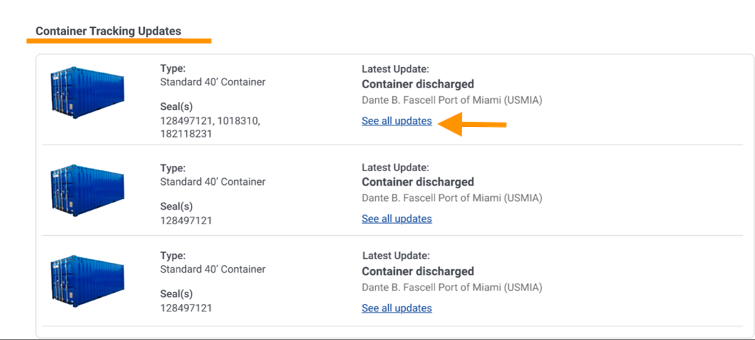
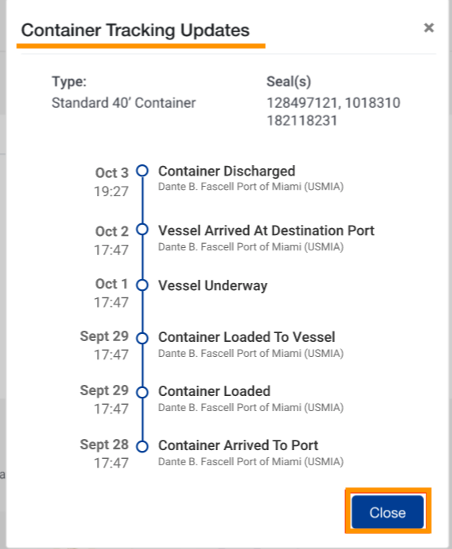
You will see Container Tracking Updates, if you click on the title “See all updates” the system will open a modal, showing you all this updates.
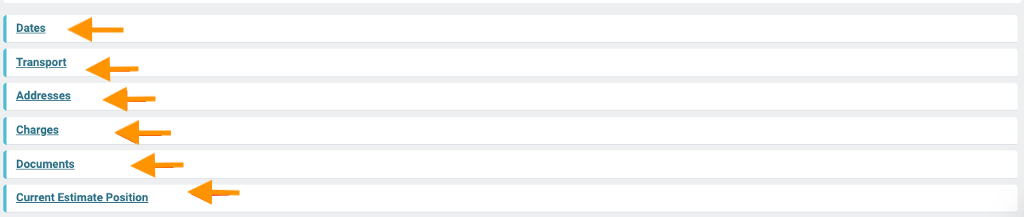
- At the bottom of this view, you will see more information like Dates, Transport, Addresses, Charges, Documents and Current Estimate Position.
- Click on the title of each one and it will drop-down more information.
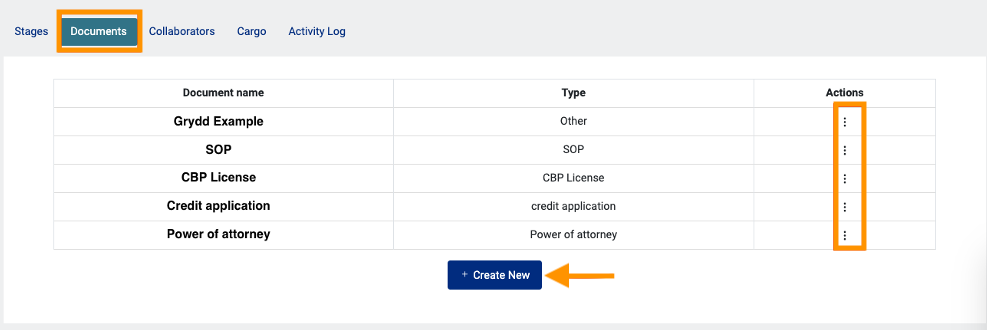
- Documents: Here you will see all the documents attached to that specific shipment.
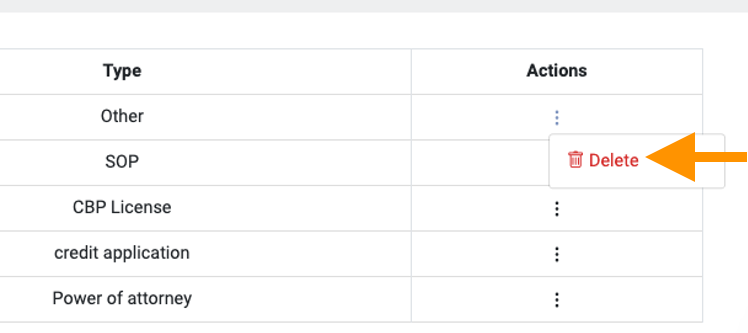
- You can click on the 3 dots menu and see the option.
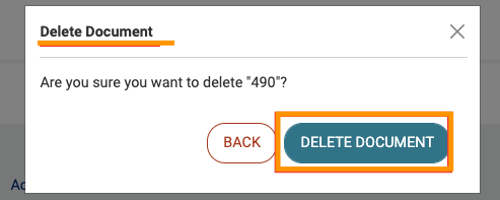
You can delete your documents.
The system will open a modal for you to confirm the elimination of the document.
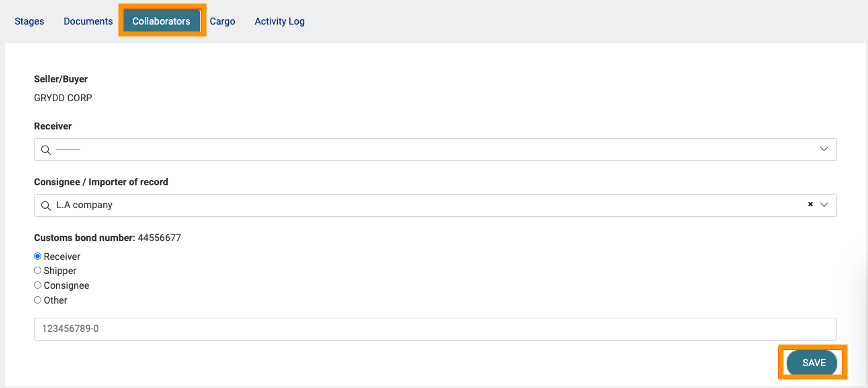
- Collaborators: You can see the Seller/buyer, add a receiver, consignee / importer of record.
- After every change you make, select save.
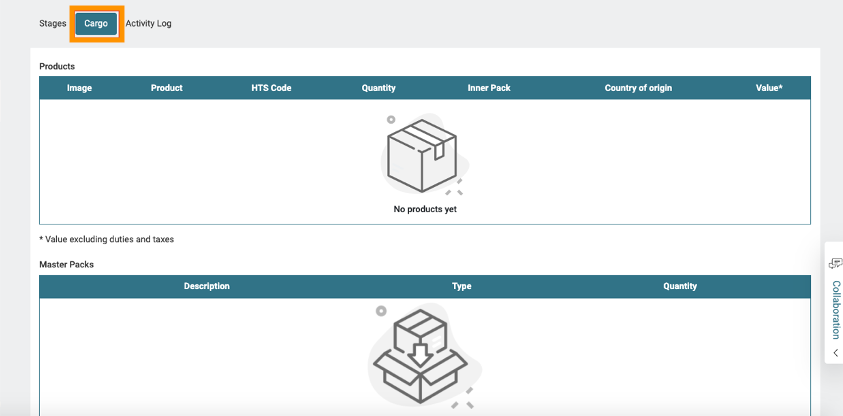
Cargo: You will see Products related with that specific shipment, Master Packs, Pallets, Cargo Details, Container Details, and the Total.
Activity Log: You will see the record of every change or update that the users related with this shipment make.
Have questions? Please get in touch via chat. We reply usually within minutes.
Grydd – The Power of One Connection