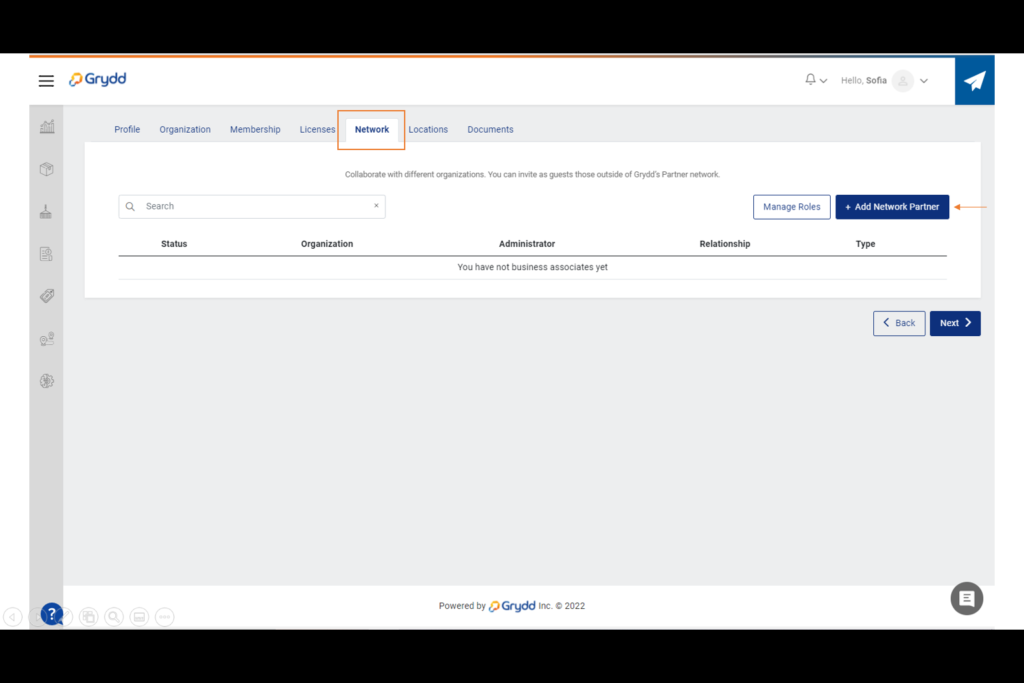
If you are new to Grydd you will have to start creating your network, by inviting all the organizations you want to work with. From your clients to your providers, they all can be invited because those invitations do not count as part of your Licenses Plan. To start sending those invites just click on “+ Add Network Partner” button, and this will display a modal window.
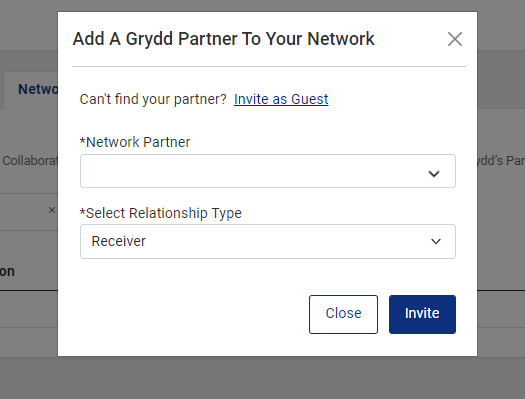
In this first view you can look up if the partner you are trying to invite is already in Grydd, by clicking on the dropdown menu for *Network Partner. If not you can click on “Invite as Guest” and this will redirect you to the “Invite Guest” screen.
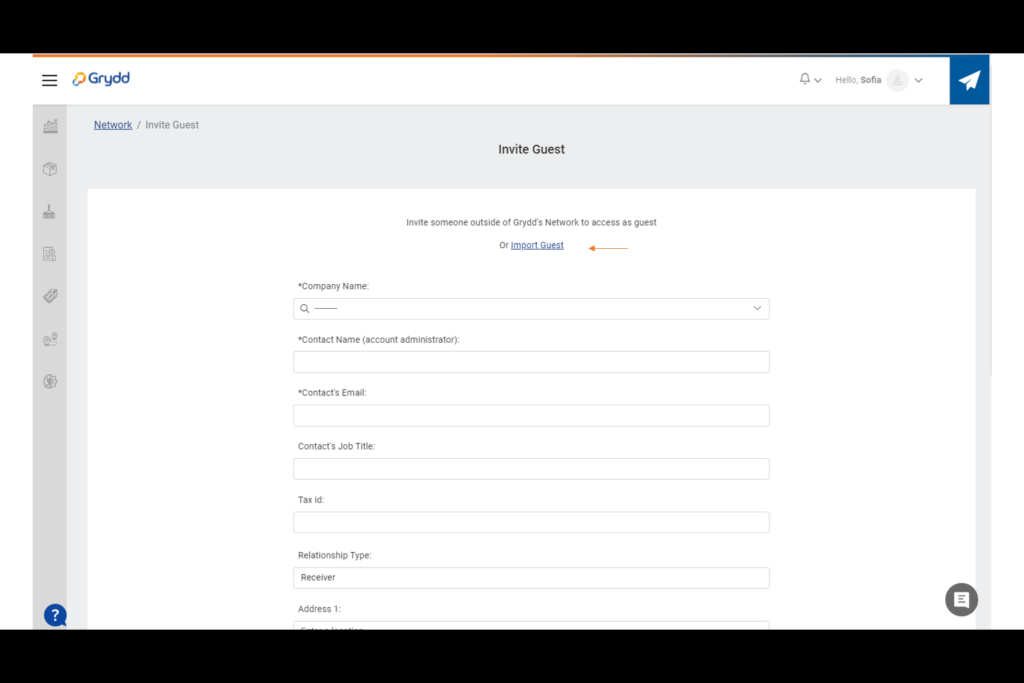
In the “Invite Guest” screen you will fill out the form with the contact information for that guest, have in mind that the required fields are marked with an (*). If you have various invitations to send, you can upload those contacts through an XLSX or CSV file. To do that click on “Import Guest” and this will redirect you to the “Import Guest” screen.
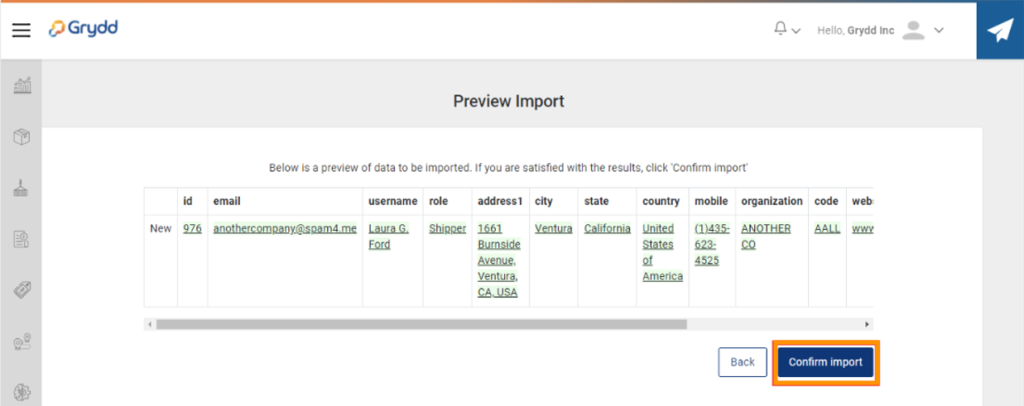
From this screen you can download the template for the upload, download instructions on how to fill out that template, and once you have the template ready you come to this same screen and click on “Choose File”, select the desired file, and format and click on “Submit”.
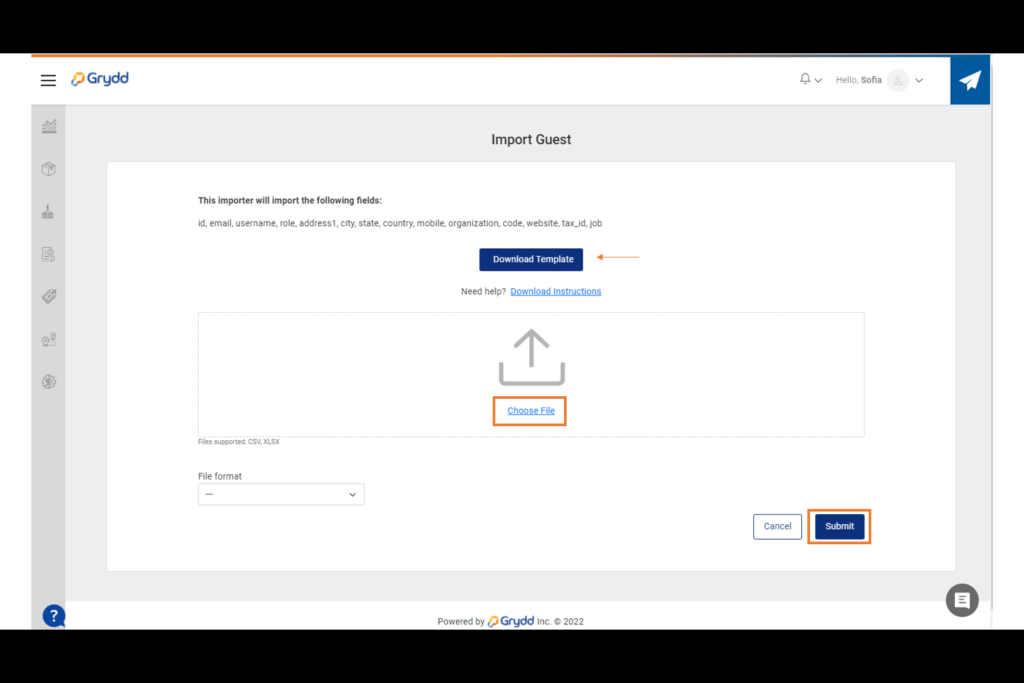
The system will validate the information and let you know if some errors were found or if it is ready for import it will redirect you to the “Preview Import” screen where you can “Confirm Import” to upload the guest list and send the invitations.
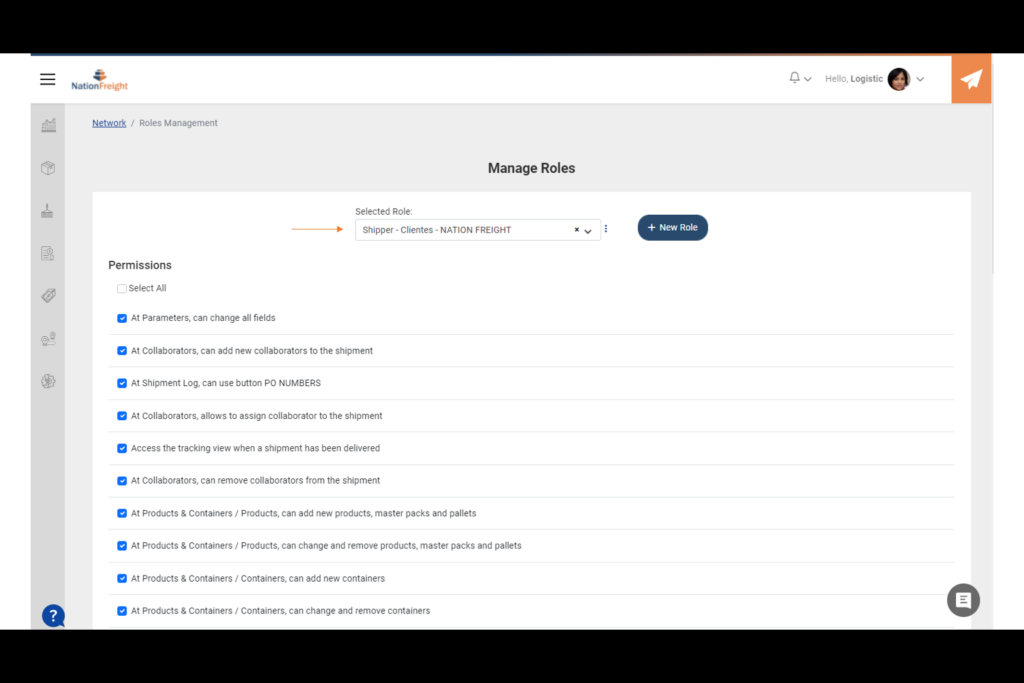
Manage Roles
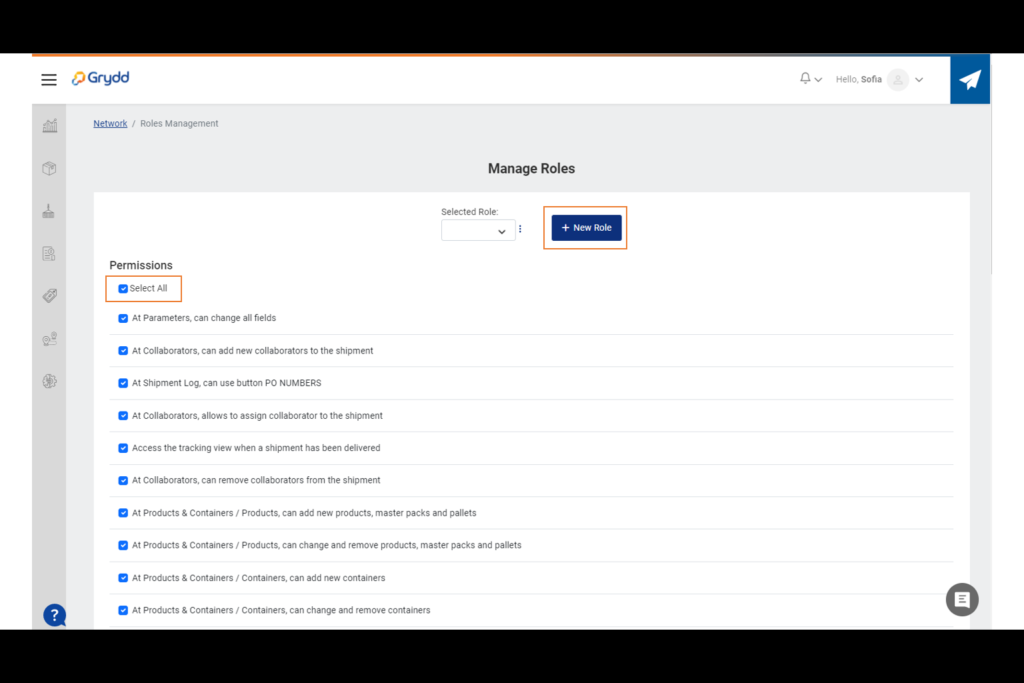
This “Manage Roles” section is meant to allow the user to create their own dynamic roles and stablish what permissions and actions are enabled for that role specifically.
So, you will find a section to create and manage the roles and right below the list with all the permissions available inside Grydd.
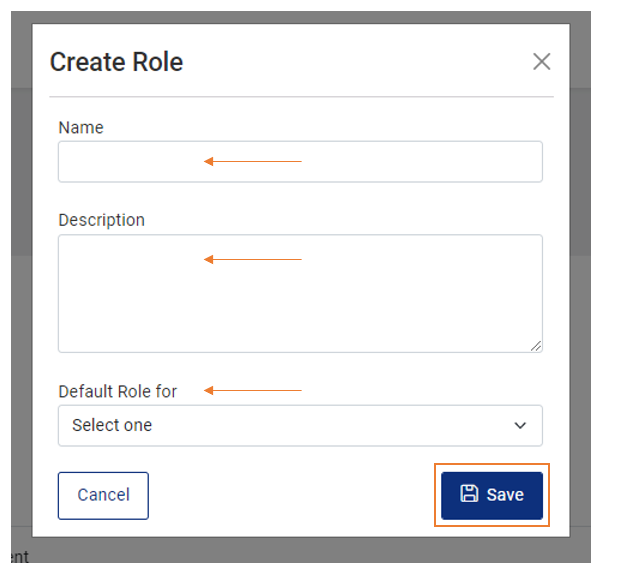
Create a new role by clicking on “+New Role”, this will open a modal window where you will need to specify a name, a brief description and specify if it is the default role for “Shipper”, “Logistic Operator” or “Observer”. Click on “Save” create the role.
The role will appear as selected and now is time to assign permissions. You just click on those permissions or actions the role will have, scroll all the way down and click on “Save” or “Update assignment”.
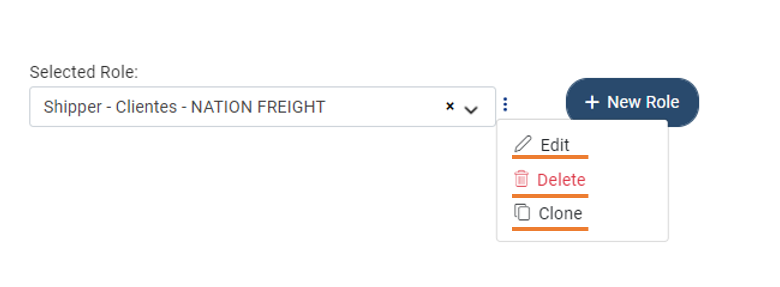
From the overflow menu (⋮) located right next to the selected role field, you can edit, clone, or delete roles.
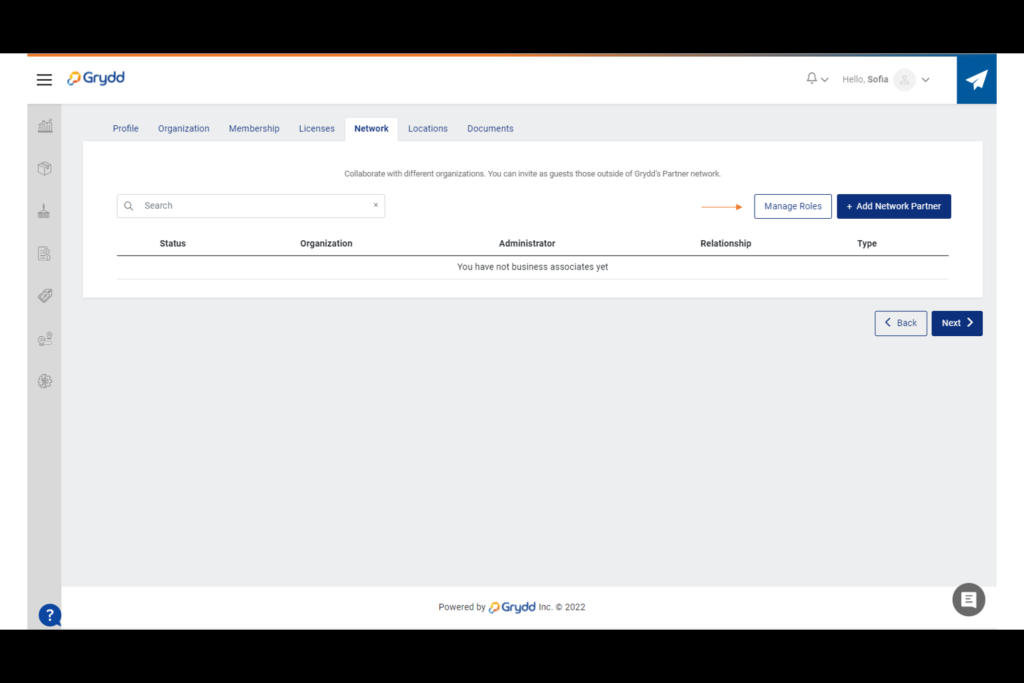
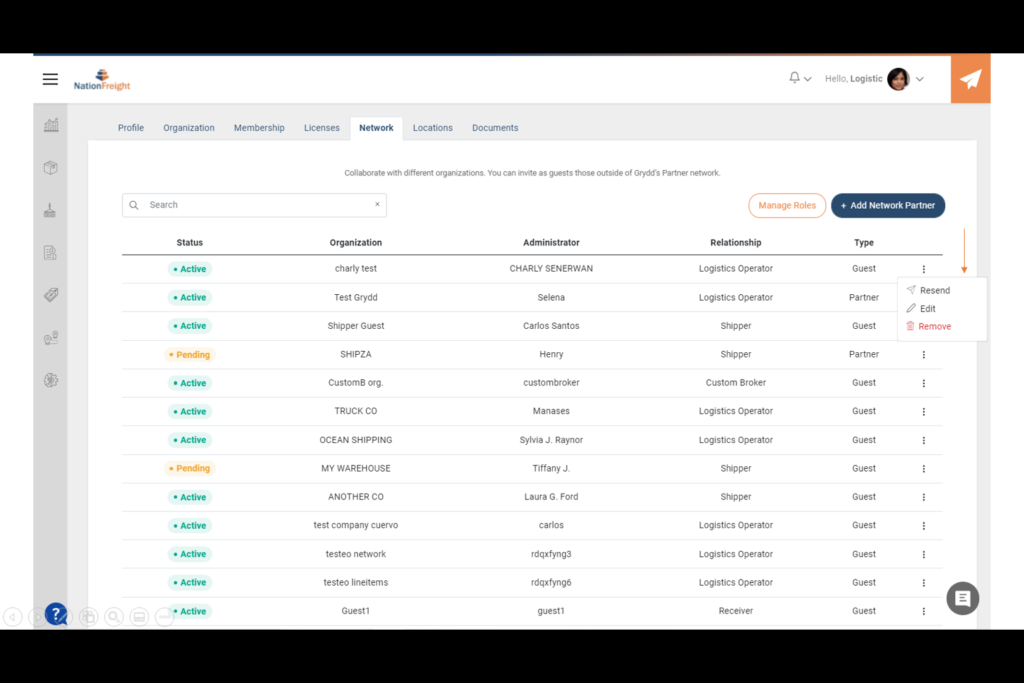
Manage Your Network
Now that you have your guests and the dynamic roles, from the Network main view you can manage your partners. By clicking on the overflow menu (⋮), which will display the “Resend”, “Edit” and “Remove” options.
Once you are all set you can click on the “Next” button, this will redirect you to the “Locations” tab. You can go back at any time to complete or edit the information.
Have questions? Please get in touch via chat. We reply usually within minutes.
Grydd – Fast forward your logistics
Leave a Reply
You must be logged in to post a comment.