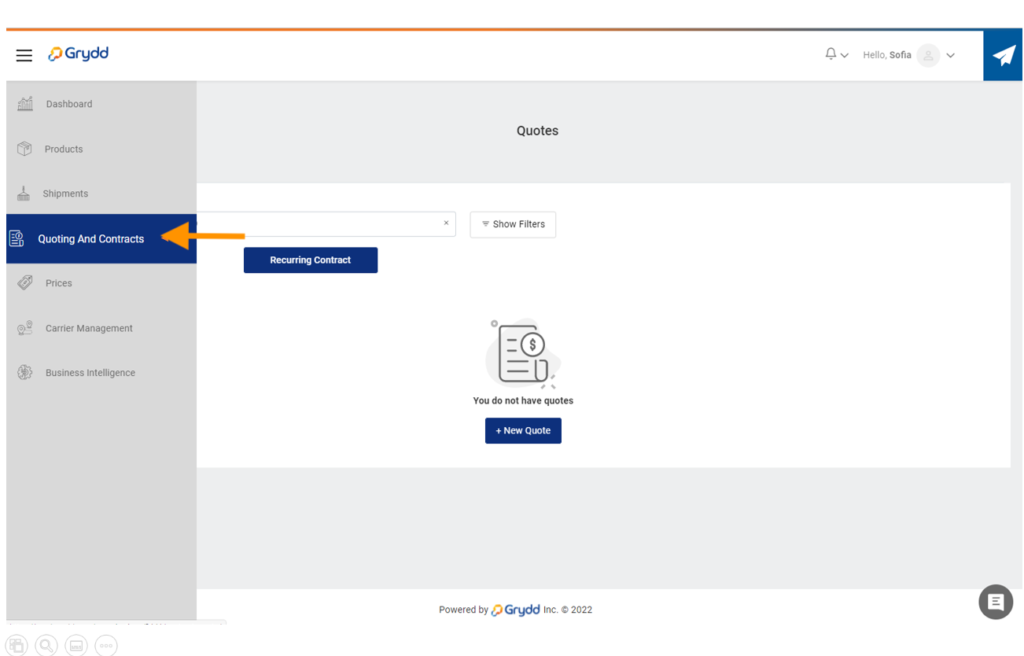
To get into this module you must select Quoting and Contracts to make the following quotes:
– Spot Quote: This quote is for a single trip.
– Recurring Contract: this type of quote is a recurring route.
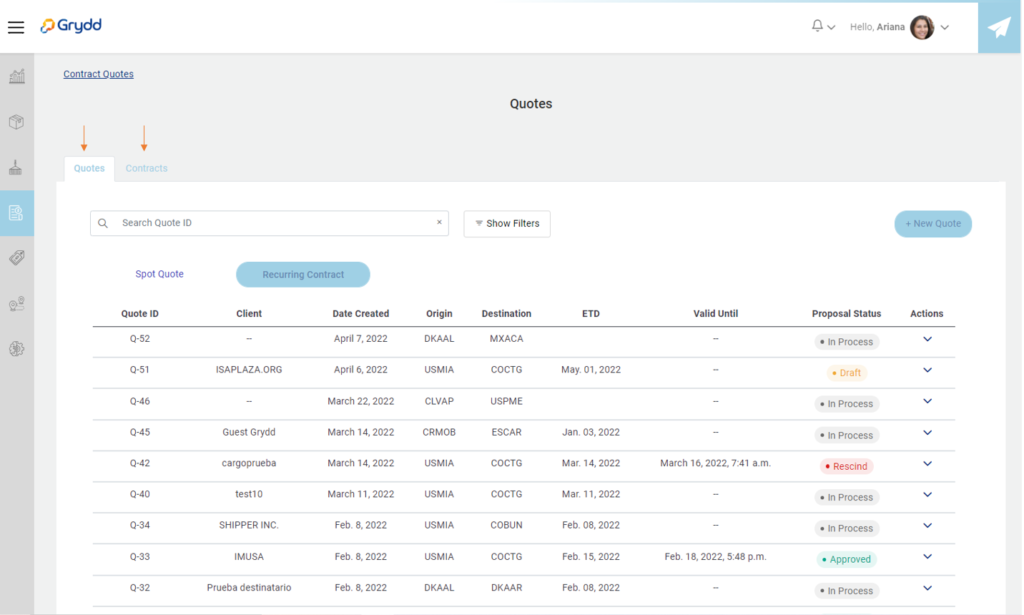
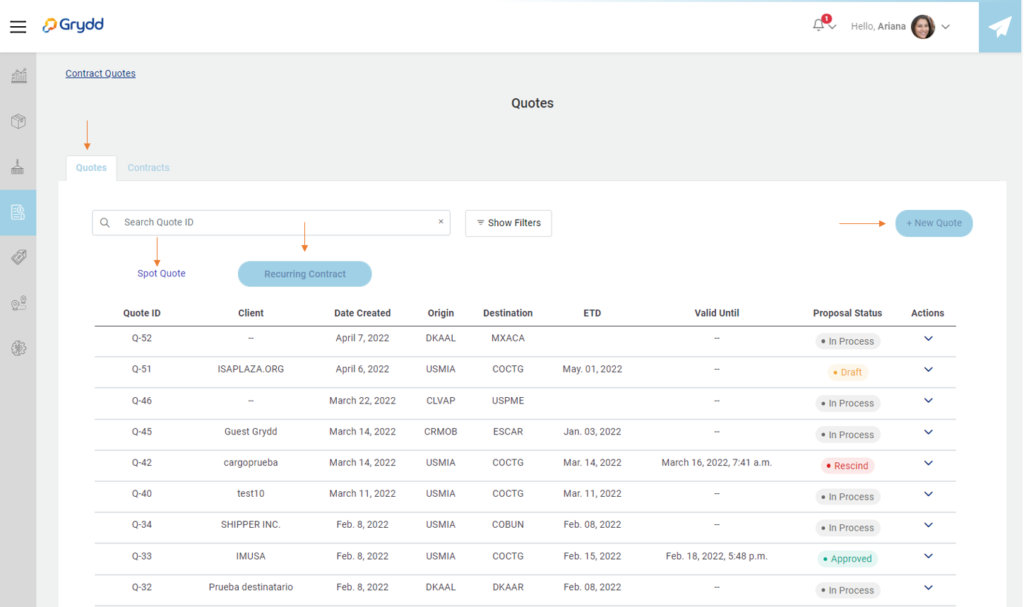
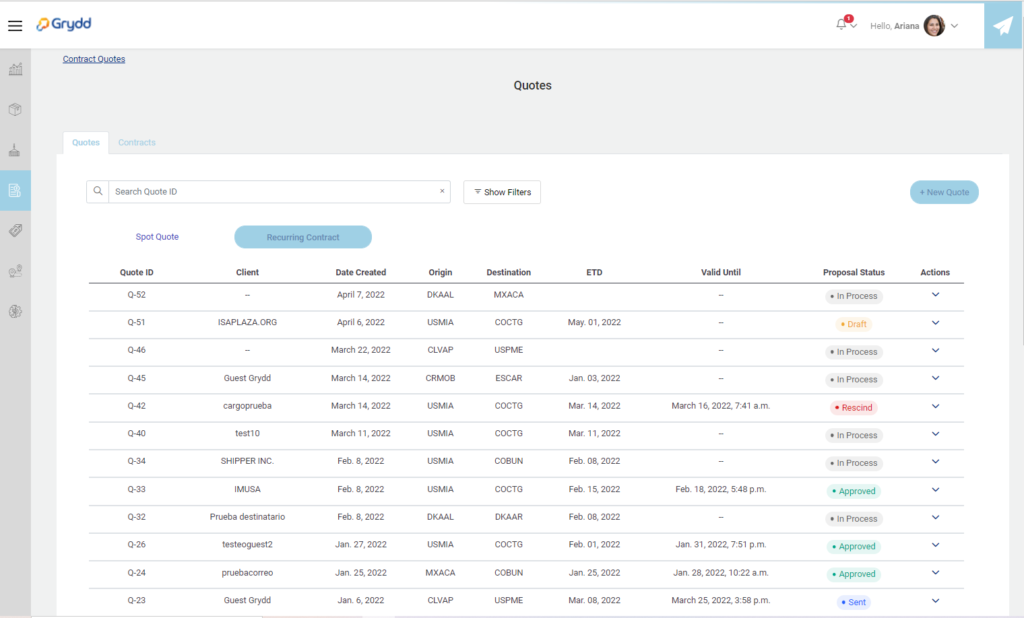
In this view you will find two tabs: Quotes, Contracts.
- Spot Quote: Here there are the proposals that are in process, draft, approved and sent.
- Recurring Contract: Here there are the quotes that are in a complete status with their respective contract.
Create a Quote
- To start click on the button “New Quote” that is displayed in the recurrent contract tab.
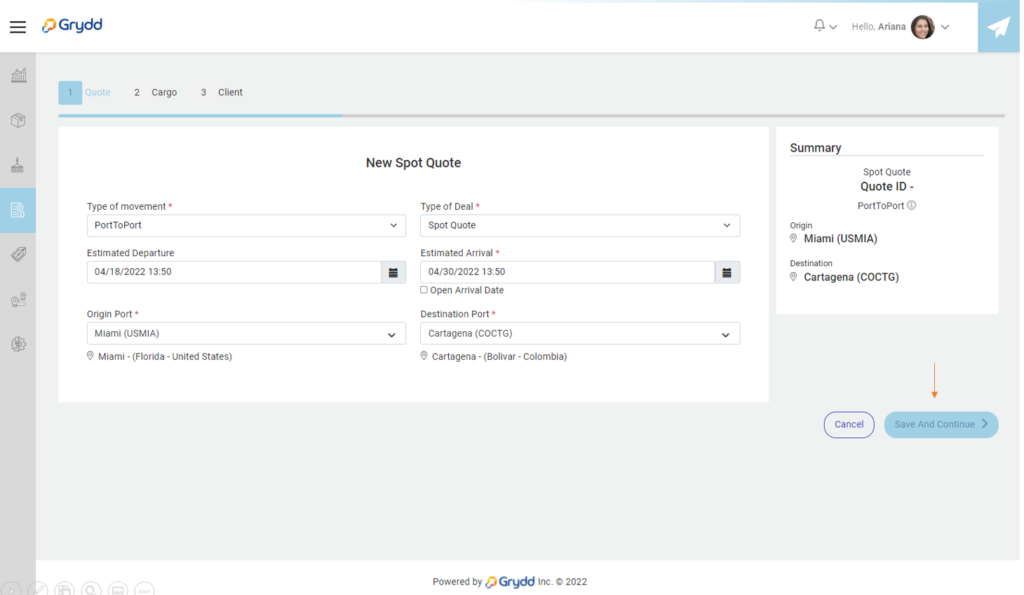
Create a spot Quote
- To carry out this flow, the following fields must be filled out:
Type of movement: You must select one of the following options:
- DoorToDoor : The cargo is collected by land and delivered by land.
- DoorToPort: The cargo is collected by land and delivered at a port.
- PortToDoor The origin of the cargo is in a port and the is delivered on land.
- PortToPort The origin of the cargo is in a port and is delivered on another port.
Type of Deal: You must select one of the following options:
- Spot Quote
- New Contract
- Contract amendment
- Estimated Departure: You must select the start date.
- Estimated Departure: You can select the end date or the check box for open arrival.
- Origin port: You must select the origin port.
- Destination Port: You must select the destination port.
Note: if you select a Door to Door, the following Pick-Up Details and Delivery Details fields will be enabled as shown below
- or Country
- or Origin City
- or Address
- or postal code
Quote:
- To continue the process must fill out the fields listed above and consider the route program pricing strategy seeking to display the itinerary.
- Click Save and Continue to continue to the next view.
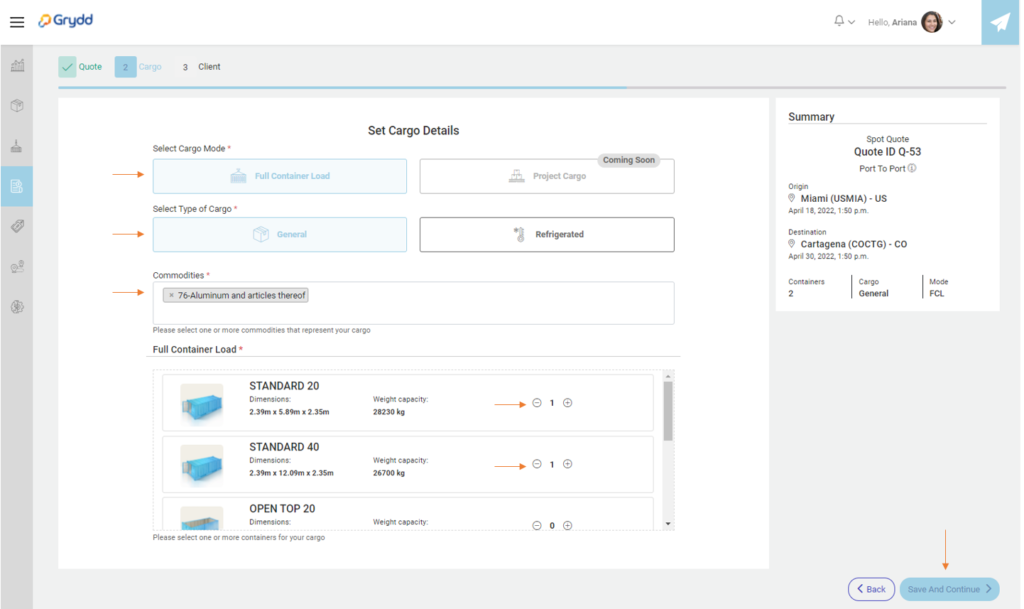
The following fields must be considered
- Full Container Load
- Select Type of cargo: you must select one of those listed below according to the products that will go on the trip.
• General: they are standard products.
• Hazardous: they are products that are carried in high-risk containers.
• Refrigerated: they are products that are carried in containers that must be refrigerated.
- Commodities: you must select the commodity or commodities according to the products that you carry in the containers. (Commodities are the characteristics that identify the category of the products carried in the containers).
Full Container Load: you must select the number of containers you will use for the trip.
- To continue the process must fill out the fields listed above and consider the route program pricing strategy seeking to display the itinerary.
- Click Save and Continue to continue to the next view.
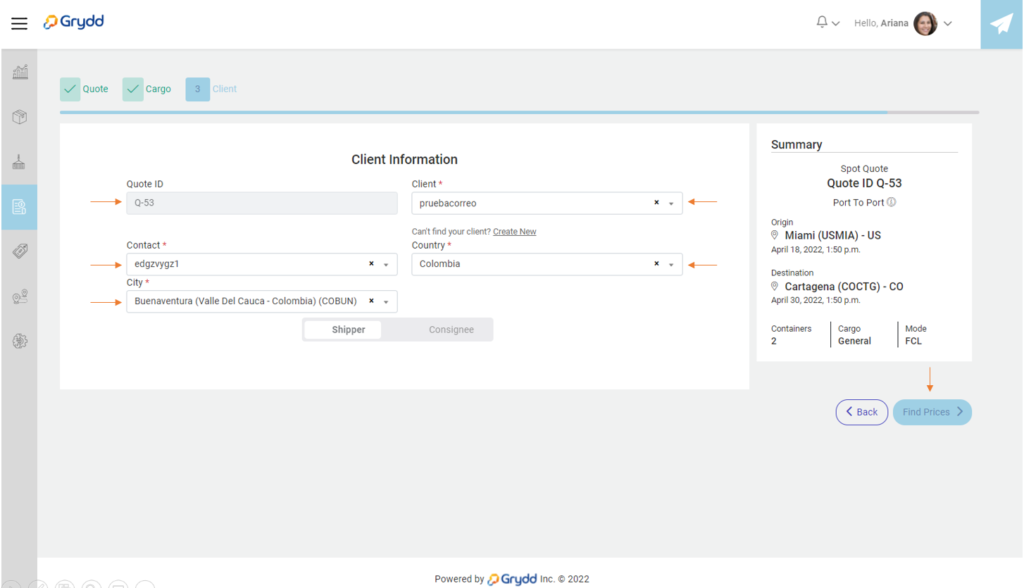
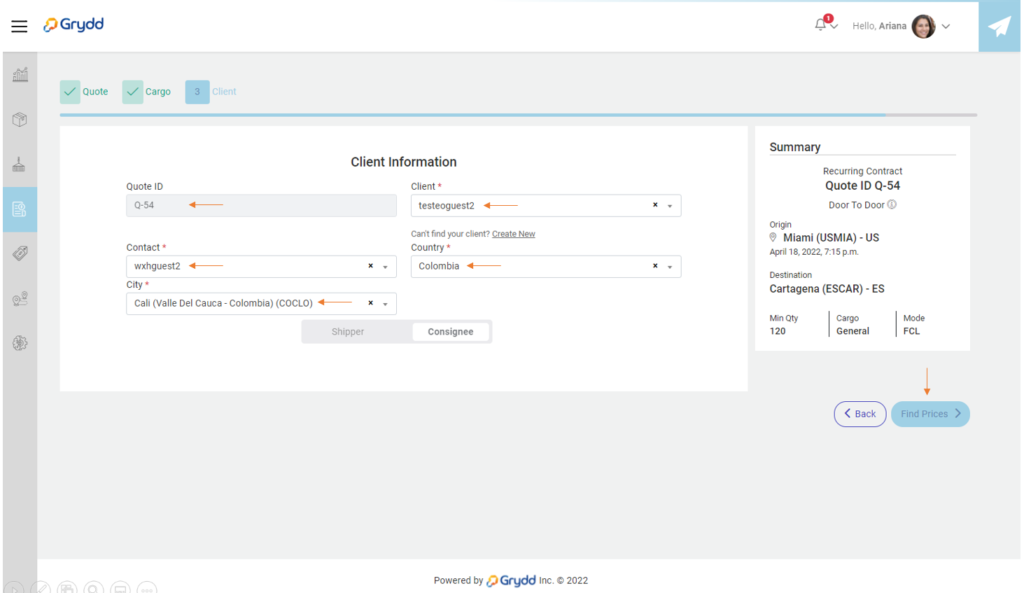
Client:
The customer information of the requested quote must be filled out:
- Quote ID: is the quote id reference, this one is generated by the systema automatically.
- Client: the client for which the requested quote will be delivered is selected.
- Contact: the customer’s contact.
- Country: nationality.
- City: city.
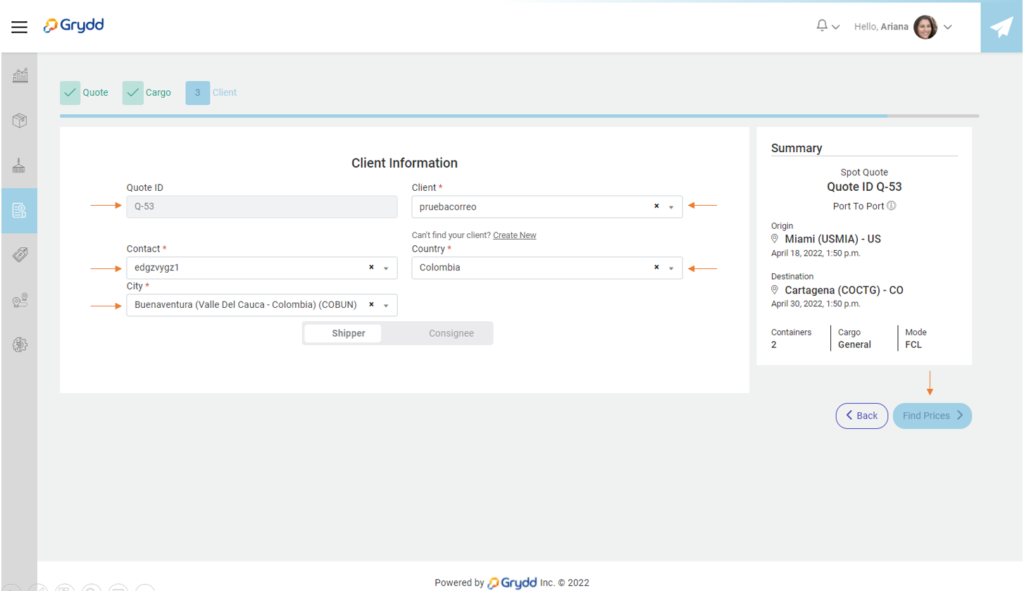
- Click Save and Continue to continue to the next view.
Note: if the client is not created in the system, you have the option to create it clicking on “create new”.
A new modal will open:
- Network Partner: Users created on Grydd.
- Select relationship type: The categories related to the charges are displayed.
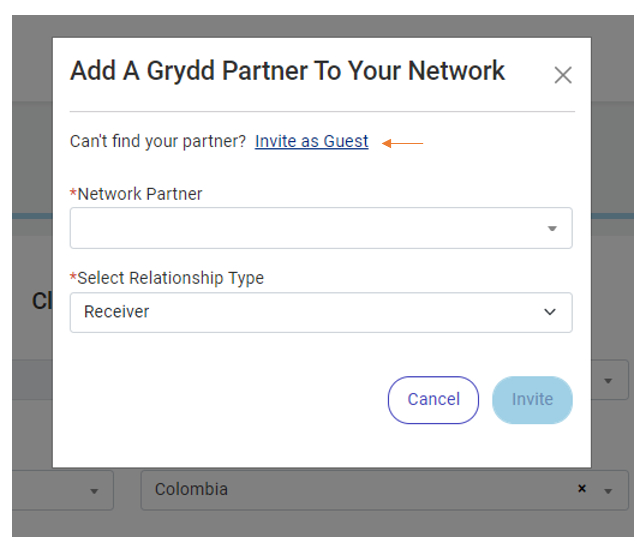
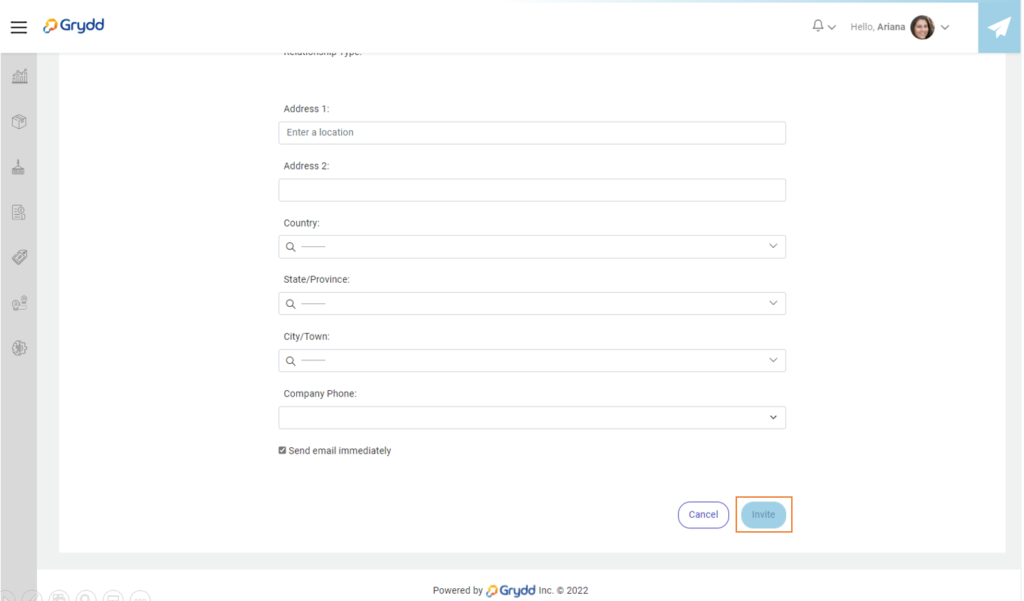
If the user is not created, click on invite a guest and you are redirected to the next view to create a user and fill in at least the required fields listed below and click on invite.
- Company Name
- Contact Name (account administrator)
- Contact’s Email
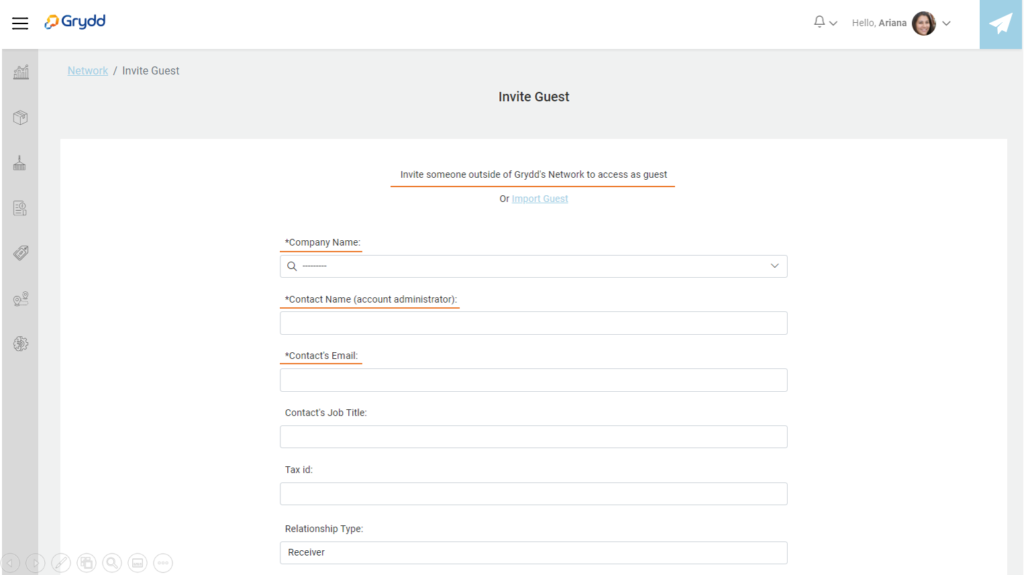
The invitation process ends.
To continue with the spot Quote flow, you must click on the button Find Prices as shown below.
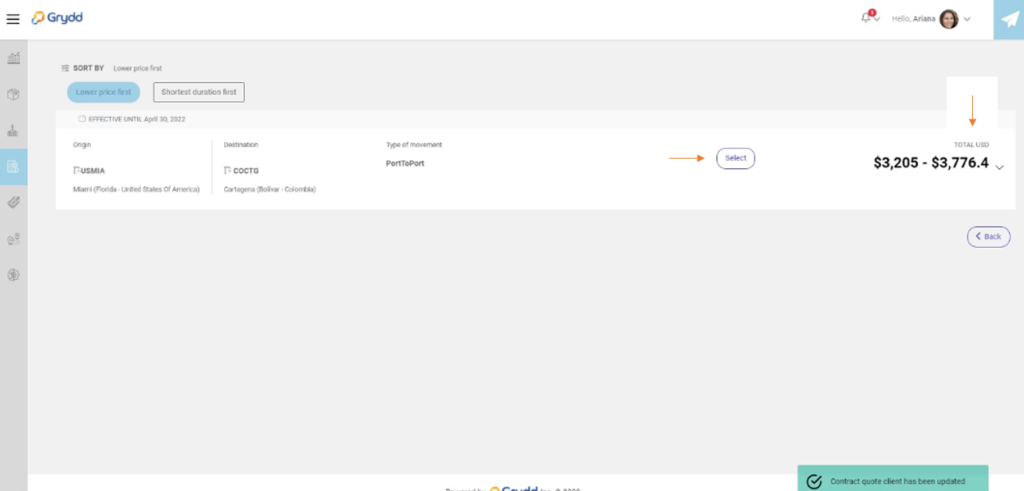
The route will be displayed according to what was selected in step 1 of the spot quote.
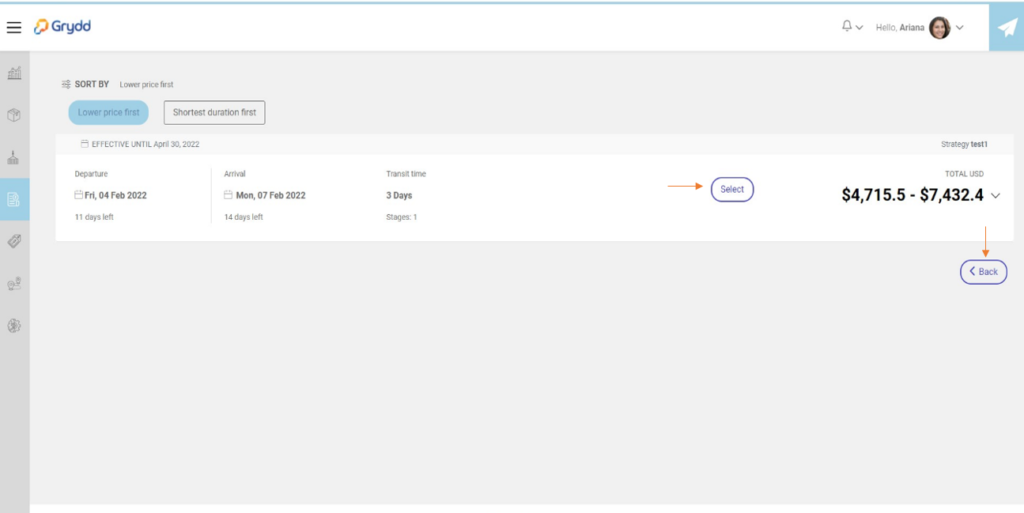
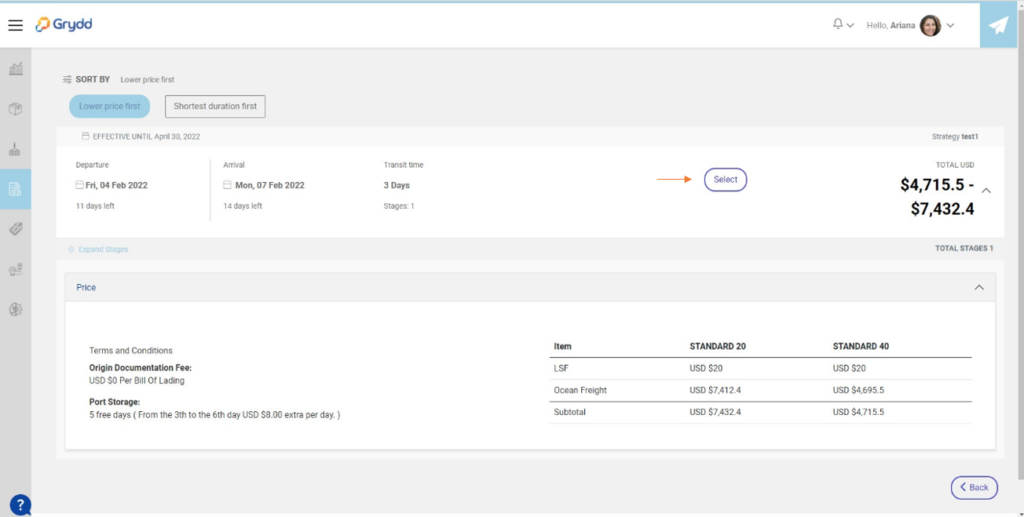
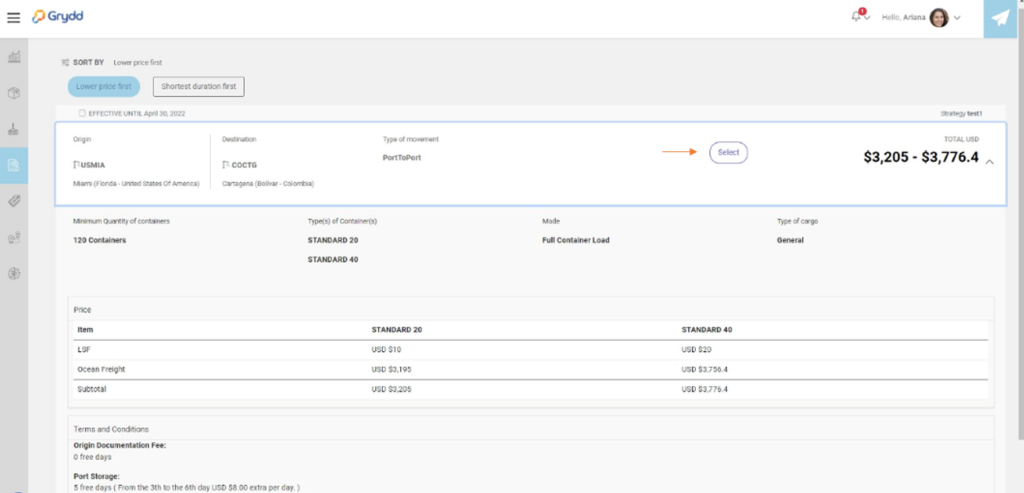
Click on the drop-down arrow, the details of the costs of the selected route will be displayed, then click on “Select”.
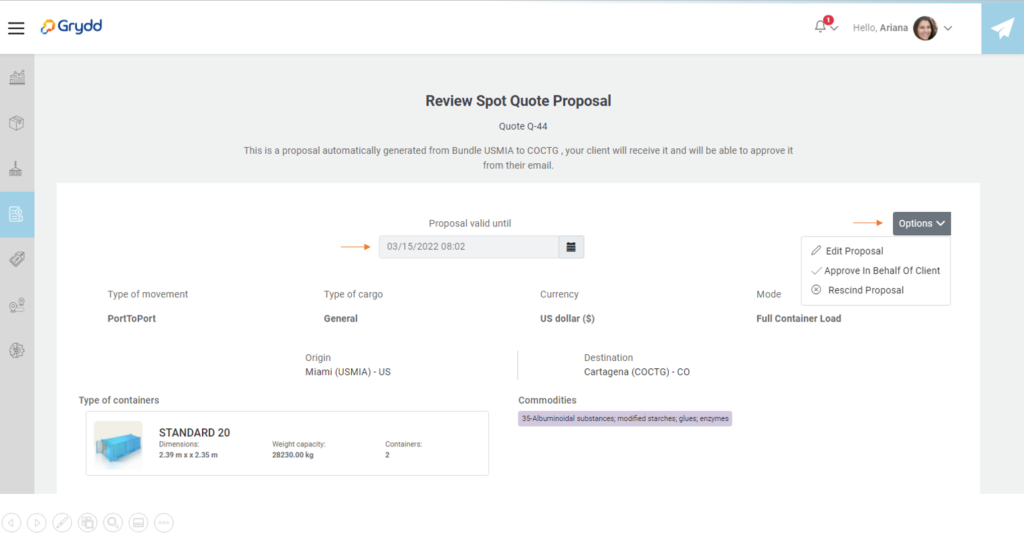
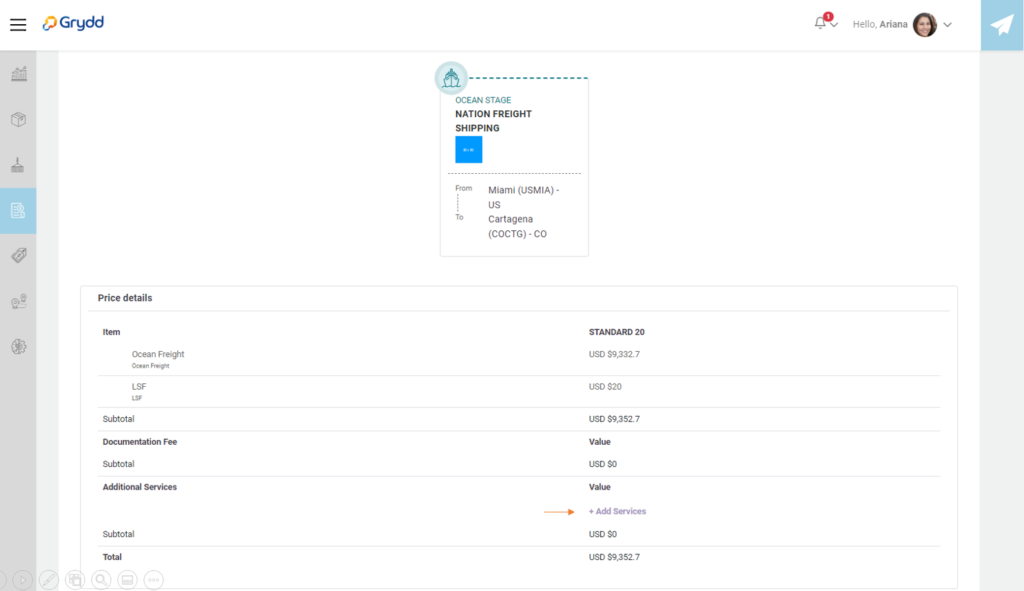
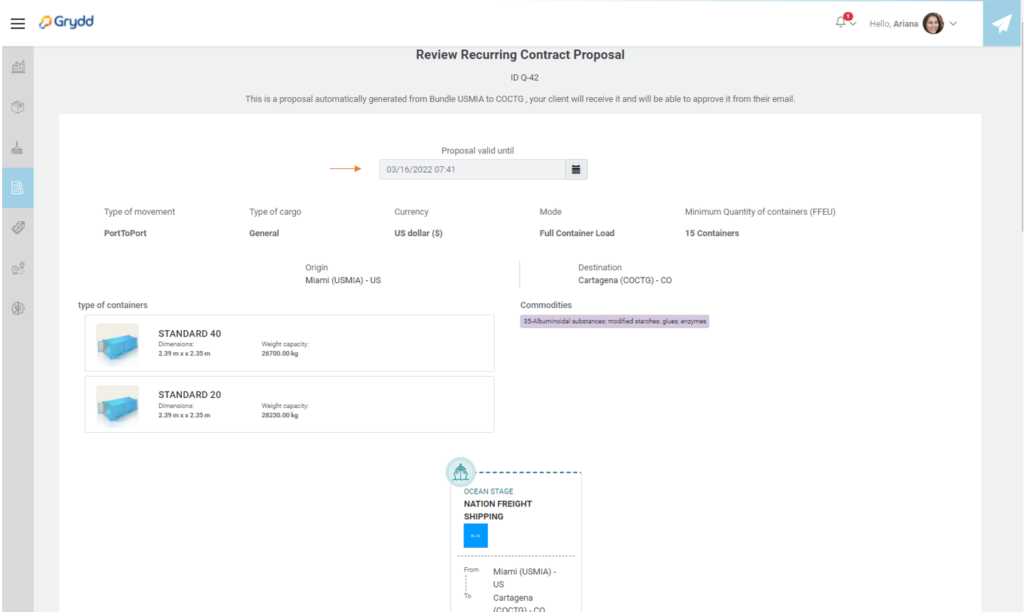
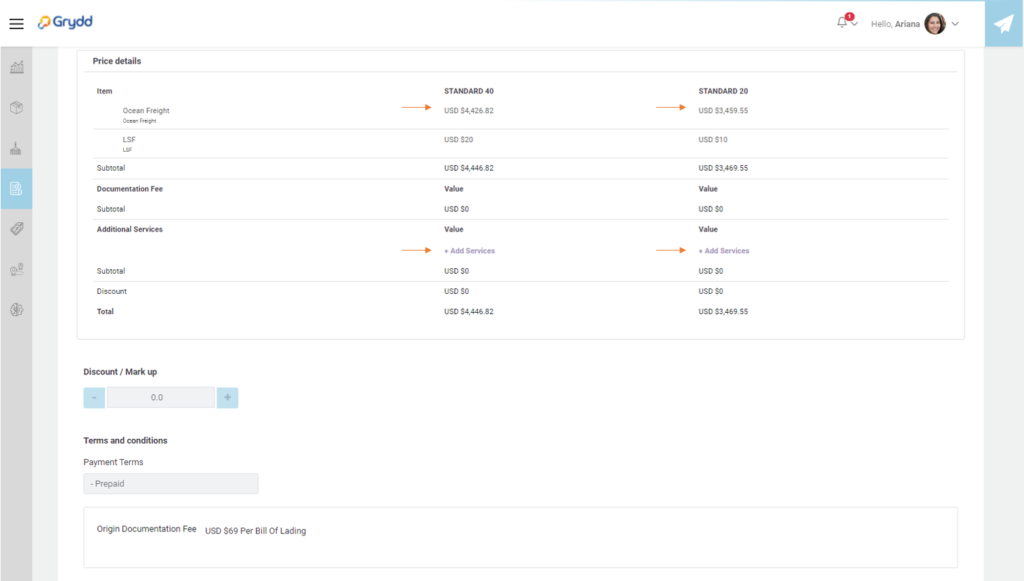
In this view below you will see a summary of the details of the route with its respective price:
- Proposal Valid useful: the date of validity of the quotation is selected.
- Option button:
- Edit proposal: Edit the quote
- Approve on behalf of client: approves the quote
- Rescind proposal: cancels the quote
The details of the prices of the route are displayed and you have the option of adding services to the selected containers (+add services) additional services for each container.
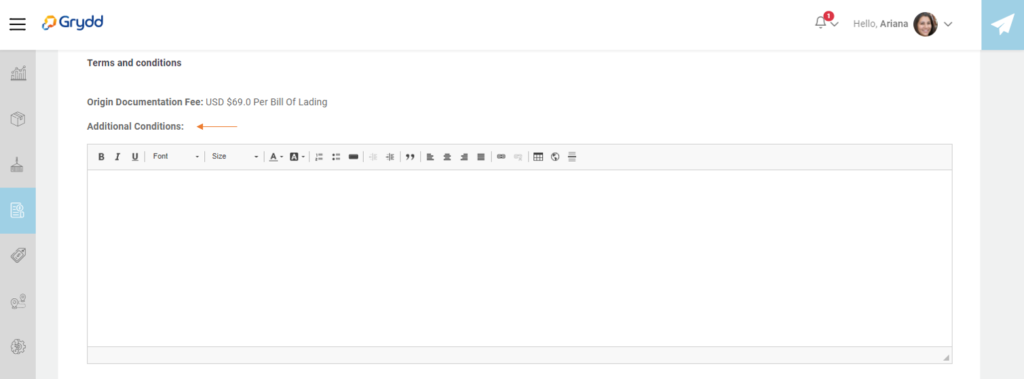
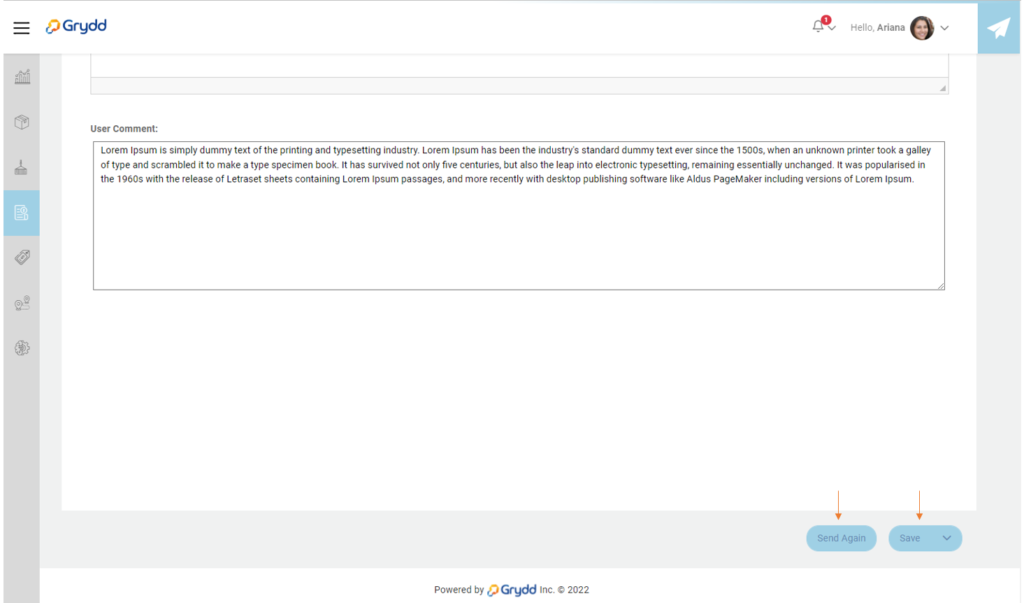
There is an additional conditions field to add comments to the quote and additionally there are the following buttons:
- Sent to client: the quote is sent to the user.
- Save: you must save first to enable the send button and you also have the option to save and exit the screen.
Click on save and then send to client, you will see a message like this.
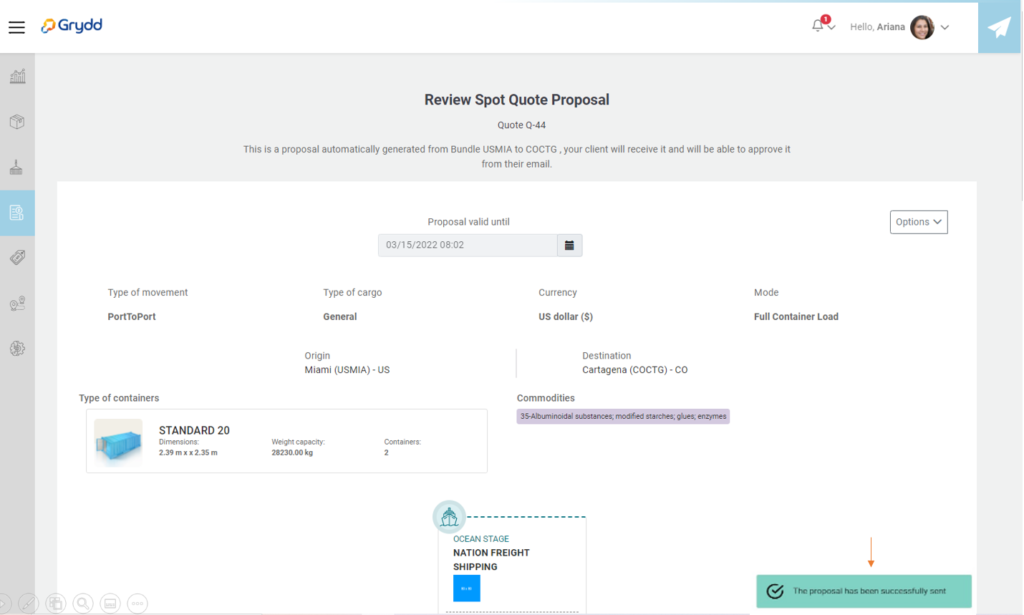
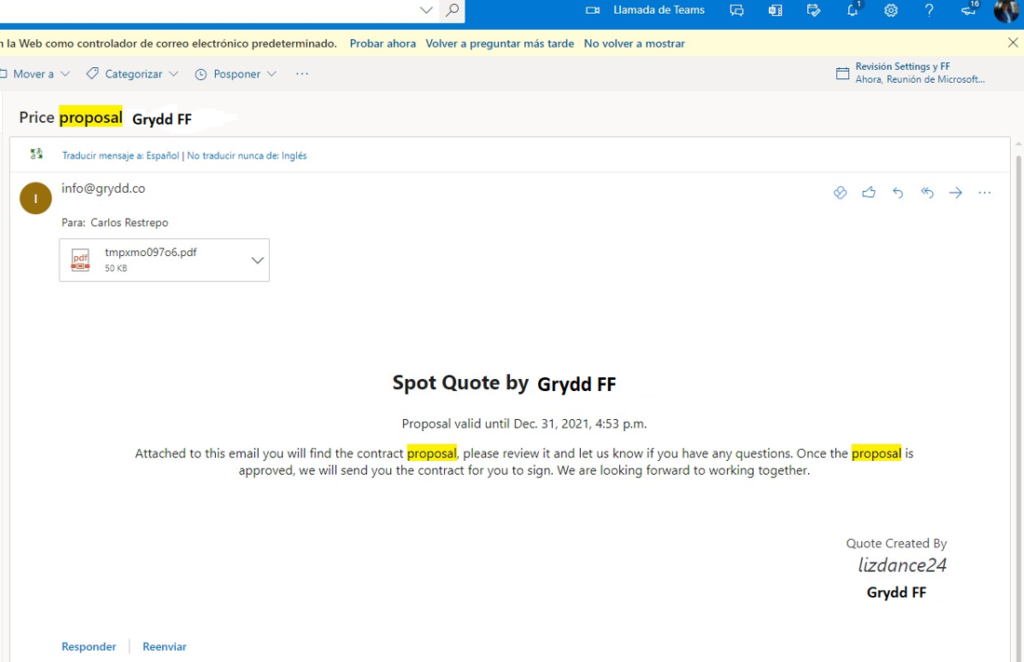
The client will receive an email like this.
- After sending the quote, click on save and go back to enter the main spot quote screen, where you can see the status of the quote. Click on the drop-down arrow to see the actions.
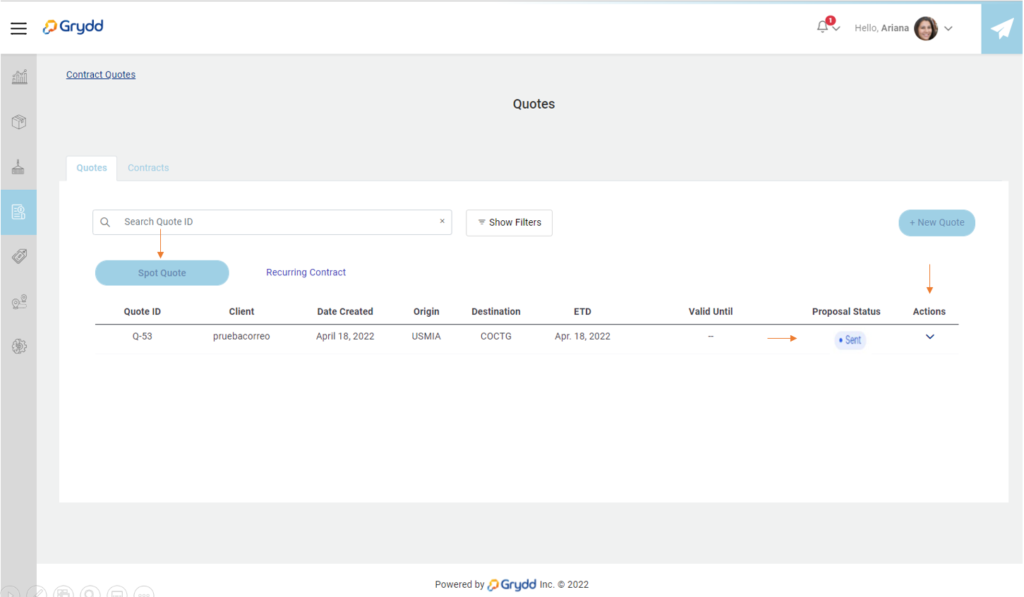
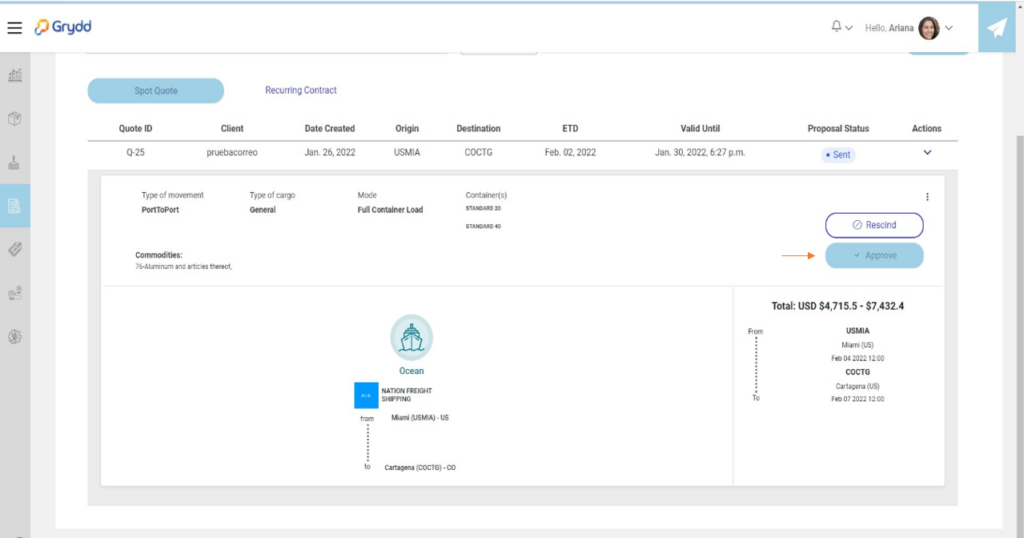
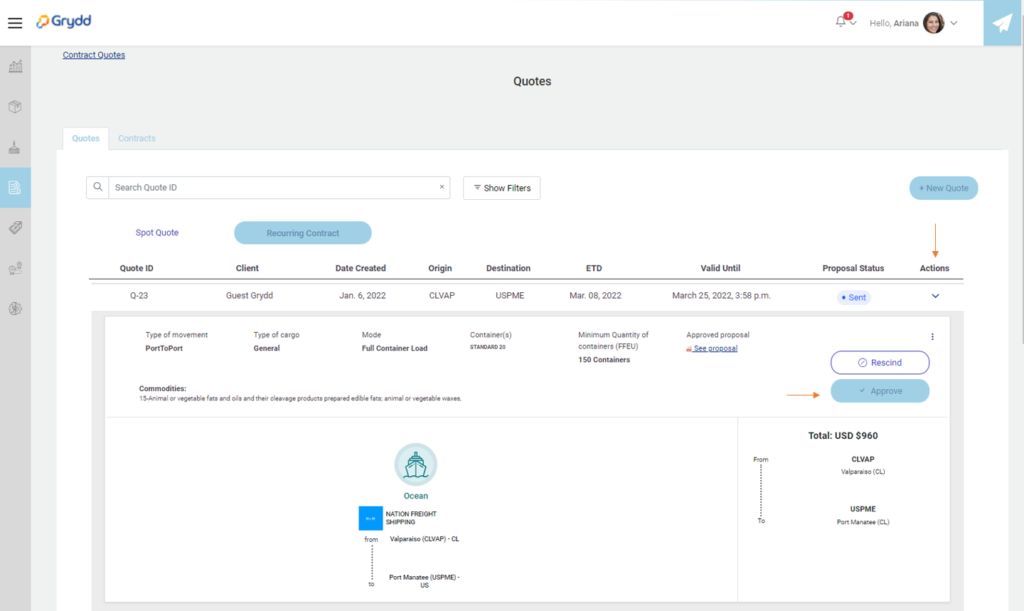
When you click on “Actions” it will display the following buttons:
- Rescind: Reject the quote.
- Approve: Approves the quote.
To approve the quote, click on the Approve button and the contract for the selected route will be automatically created.
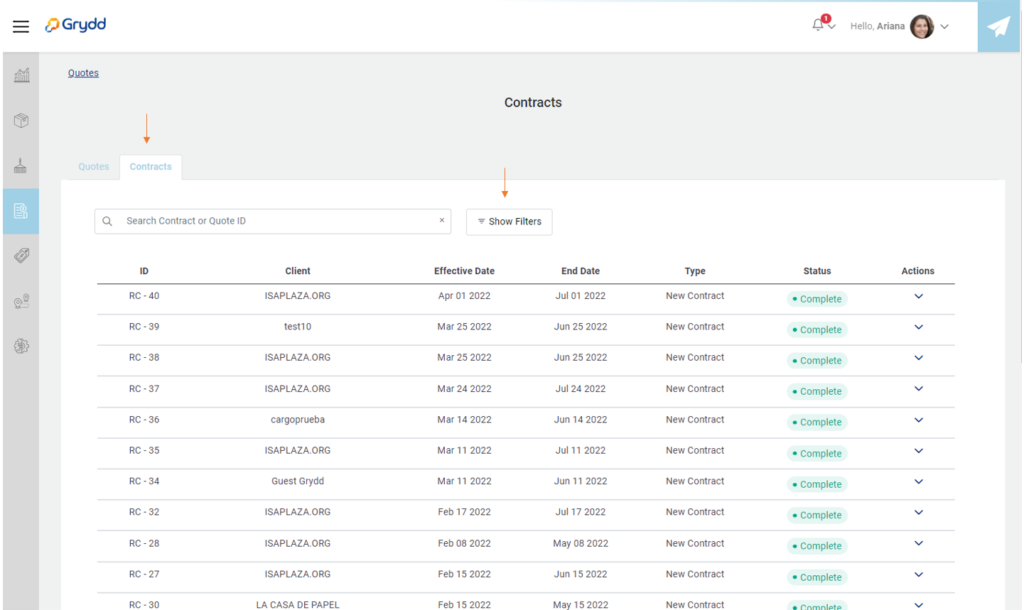
Click on “Contracts” tab, you will see that you have the option to use Filters for a custom search. Click on “show filters”.
- Status
- Client
- Origin
- Destination

After searching for the spot quote, click on Actions and click on Review.
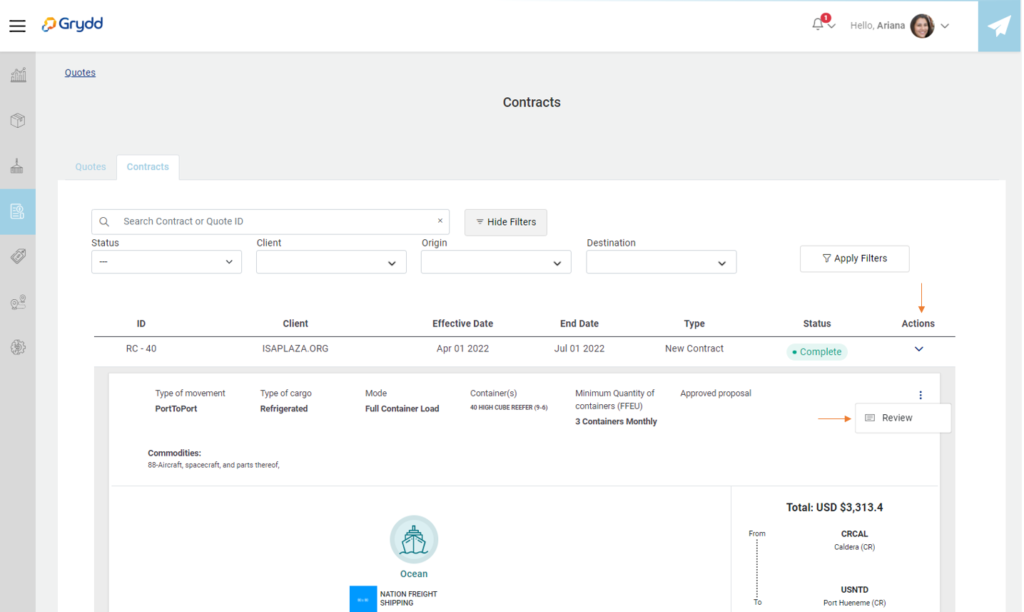
The contract that was automatically generated for the spot quote flow is displayed and the quote process ends.
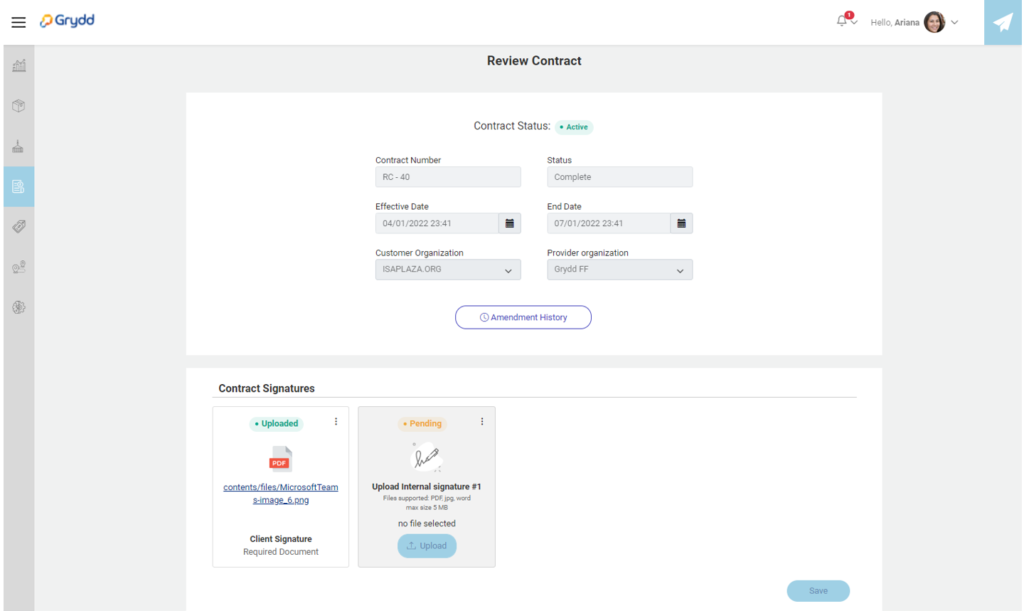
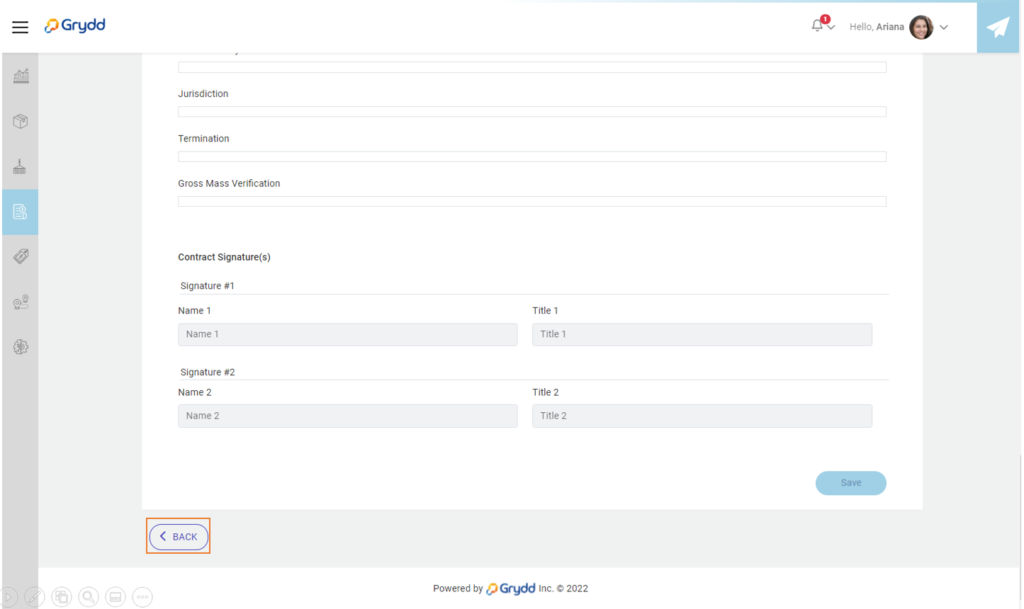
You will see an option to add contract signatures once you uploaded click on save.
Recurring Contract Flow:
- To carry out this process, click on the button + New Quote that is displayed in the quotes or contracts tab.
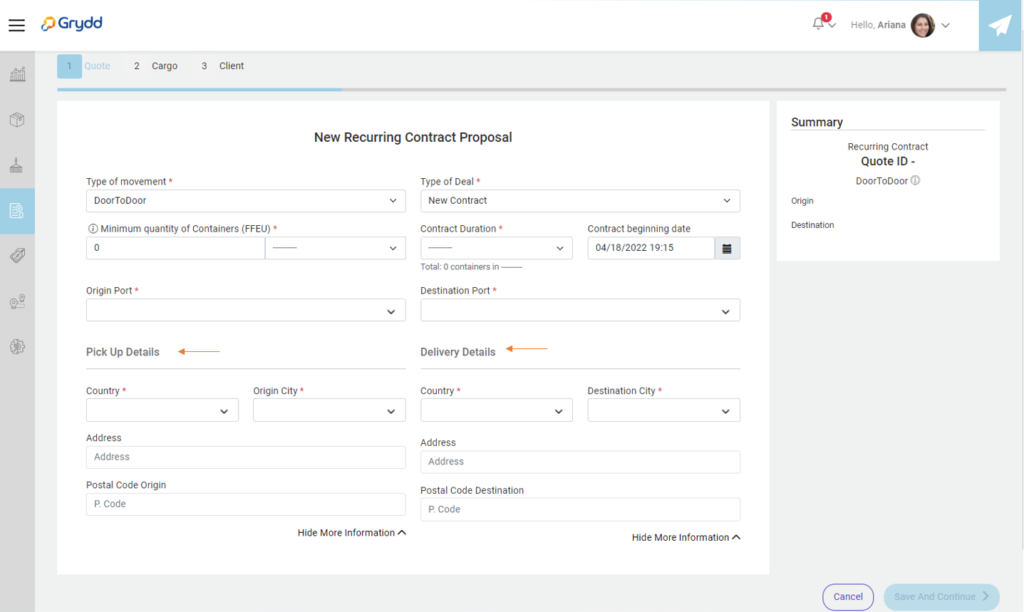
To carry out this flow, the following fields must be filled out:
Type of movement: You must select one of those listed below.
- DoorToDoor: The cargo is collected by land and delivered by land.
- DoorToPort: The cargo is collected by land and delivered at a port.
- PortToDoor The origin of the cargo is in a port and the is delivered on land.
- PortToPort The origin of the cargo is in a port and is delivered on another port.
Type of Deal: You must select one of those listed below
- Spot Quote.
- New Contract
- Contract amendment.
- Minimum quantity of Containers (FFEU): are the quantity of container that must be filled in the recurring contract.
- Contract Duration: it is a drop-down list where the time of the contract is displayed.
- Contract Beginning date: date that initiates the contract.
- Origin Port: You must select an origin port.
- Destination Port: You must select a destination port.
Note: if you select a Door to Door, the following Pick-Up Details and Delivery Details fields will be enabled as shown below.
- Country
- Origin City
- Address
- postal code
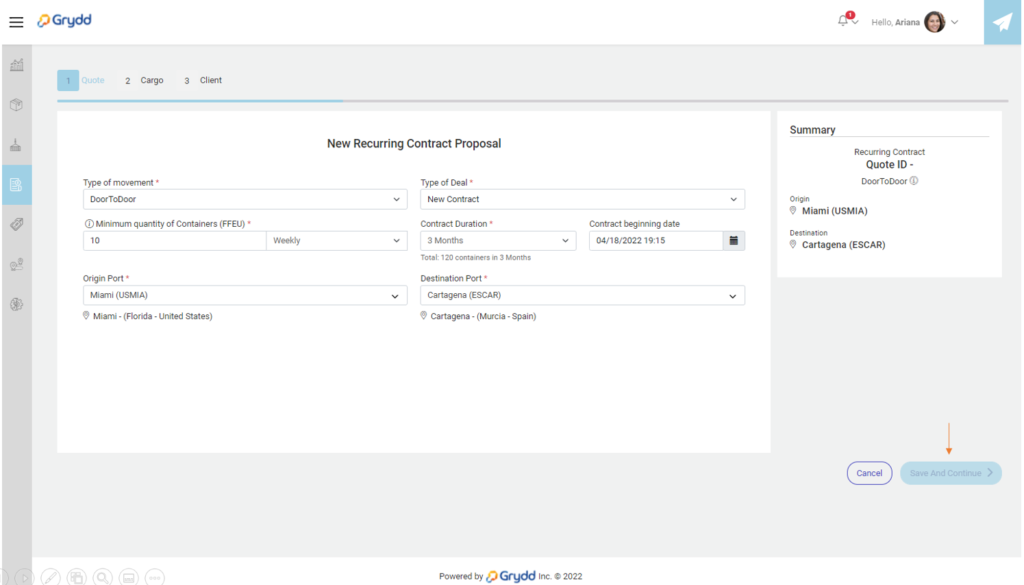
The information for recurrent contract is filled out.
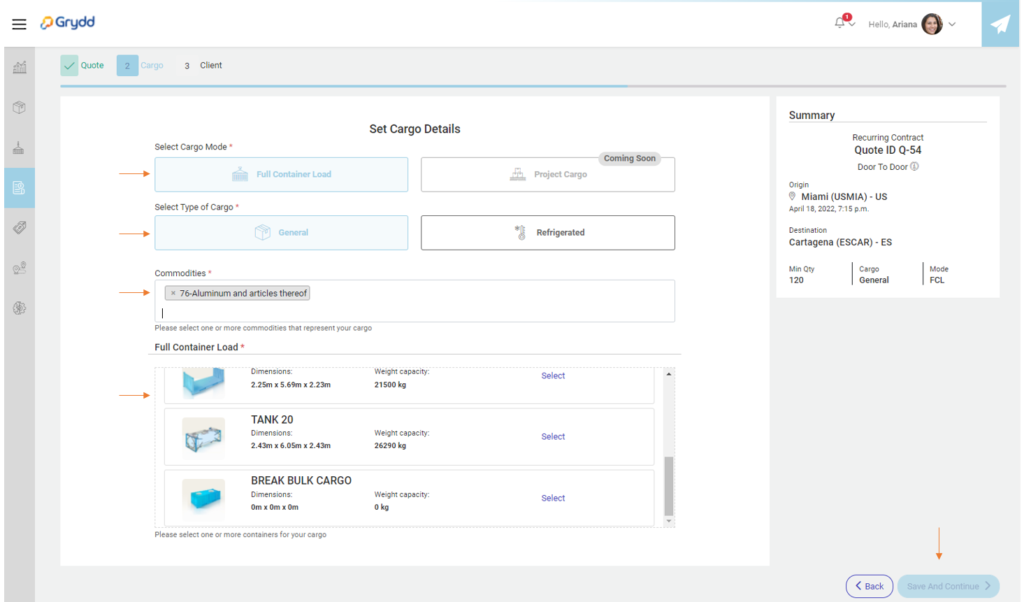
The following fields must be considered
- Full Container Load
- Select Type of cargo: you must select one of those listed below according to the products that will go on the trip.
• General: they are standard products.
• Hazardous: they are products that are carried in high-risk containers.
• Refrigerated: they are products that are carried in containers that must be refrigerated.
- Commodities: you must select the commodity or commodities according to the products that you carry in the containers. (Commodities are the characteristics that identify the category of the products carried in the containers)
- Full Container Load: you must select the containers that you will use for the trip.
- Click on Save and Continue.
The view of the client will be displayed where the carrier user must fill in the information of the client who is going to request the quote
- Quote id: it is the id of the quote
- Client: the client requesting the quote
- Contact: the quote contact
- Country: nationality of the user requesting the quote
- City: city of the user requesting the quote
Then click on “Find Prices”.
The selected route will be displayed.
Click on the drop-down arrow to see the details of the selected route with its respective costs per container.
Click on “Select” and the following view will be displayed with its respective quote, the validity date of the quote must be filled in.
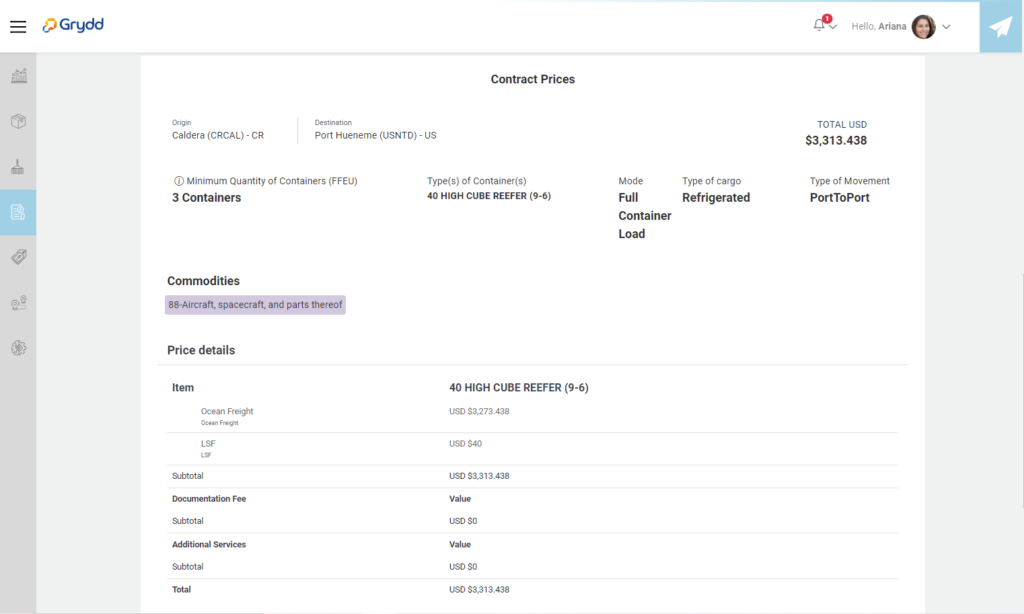
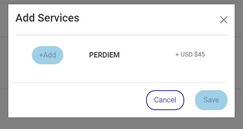
- The details of the costs for each container are displayed and you have the option to select additional services.
- Click on add service, the following view will appear and to add it you must select save.
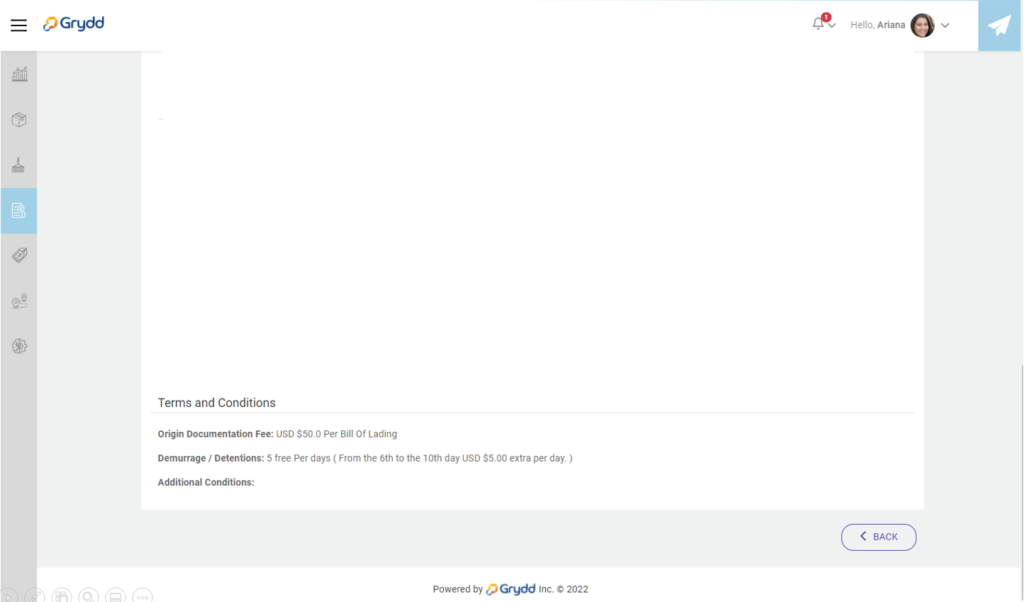
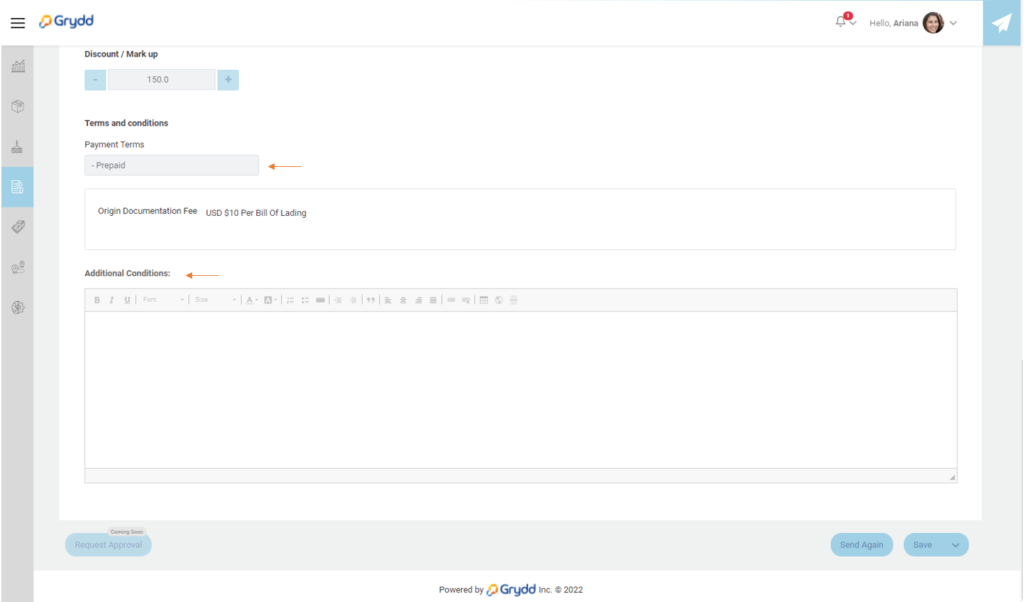
Select the payment terms and additional conditions
- You can see the terms and conditions of the pricing strategy of the configured route.
- Payment terms: a drop-down list will appear for which you must select an option
- Prepaid
- Collect
- Collect 3rd party
- Collect COD
- Additional conditions: a text field to fill in additional comments to the quote
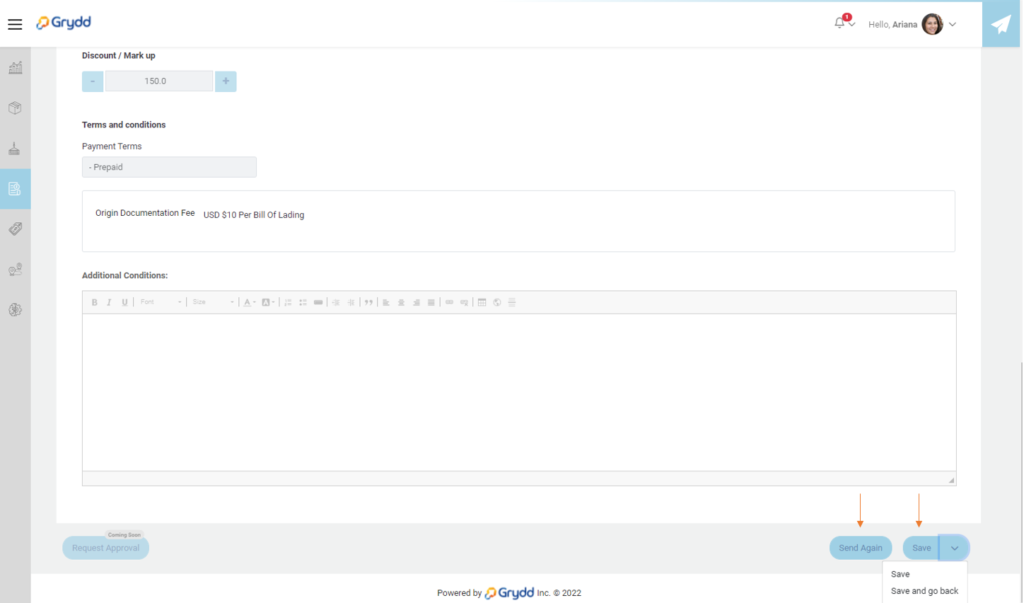
It has the following buttons:
- Sent to client: the quote is sent to the user by email.
- Save: you must save first to enable the send button and you also have the option to save and exit the screen.
When the quote is sent, the user can see the status of the quote that was sent, the following states are:
- Draft: quote made but without sending the email of the quote.
- Sent: quote sent to the client.
- Approved: quote approved by the client.
- In process: it is the quote request that is in the process of being carried out and has not
- After the user approves the quote, the carrier user clicks on “Actions” to see more information.
Note: You can approve the quote on behalf of the client, clicking on the button “options” at the top of the view.

Select the “Approve” button and the button “Generate contract” will be available.
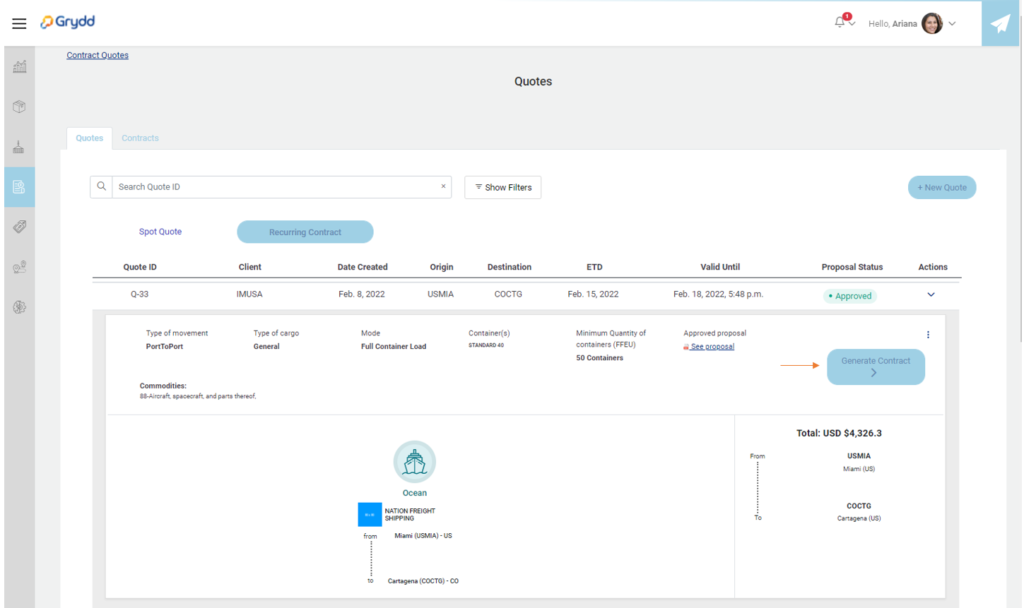
Click on the button and it will load the following view where you can see the quote summary ready to generate contract, you must click on save and then the generate contract button.
- Contract number: consecutive number of the generated contract
- Status: are quote statuses
- Effective Date: start date of the contract
- End Date: End date of the contract
- Customer Organization: Quotation user
- Provider Organization: user organization
- Upload signed contract: the contract signed by the client is uploaded.
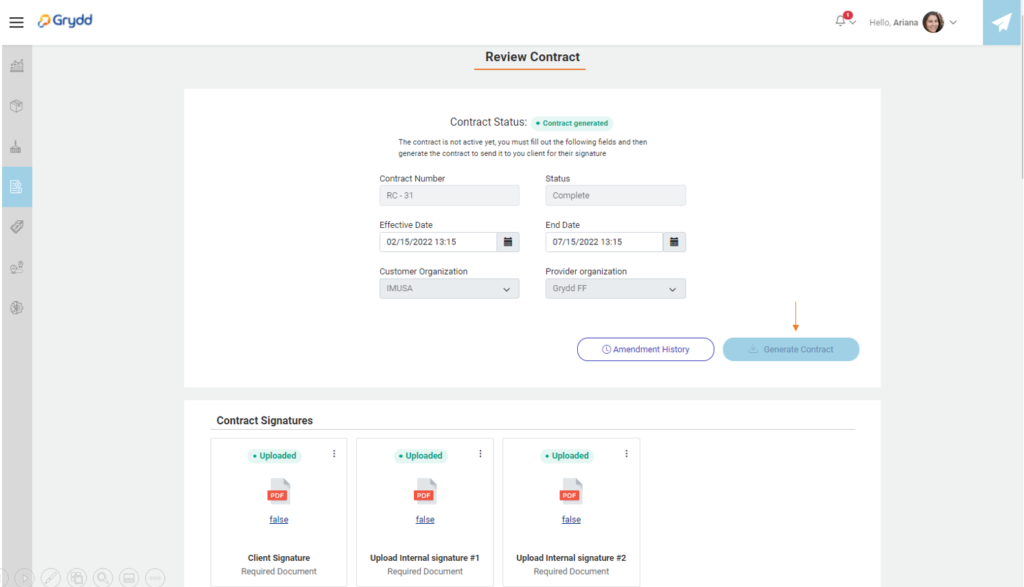
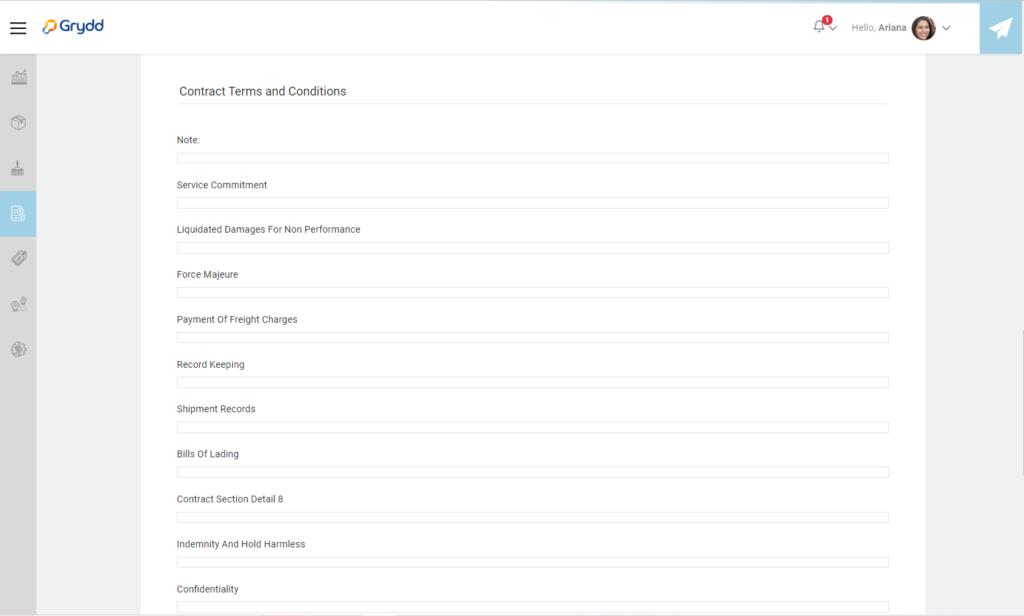
You will see the contract terms and conditions added previously, as well as the signatures. This text will change according to your company. You can set it up in settings.
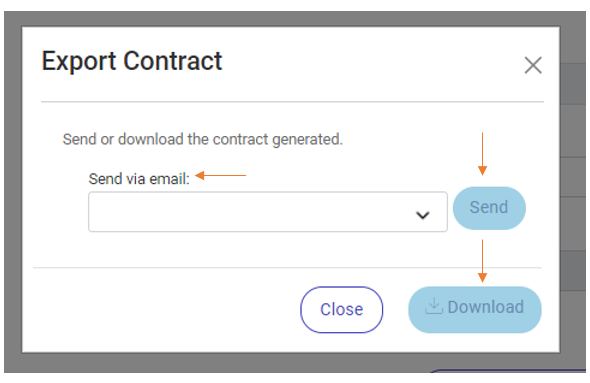
When you click on the “Generate contract” button, a modal will be enabled where the user will write an email that will receive the contract attachment, or you can download the contract that was automatically generated in PDF format.
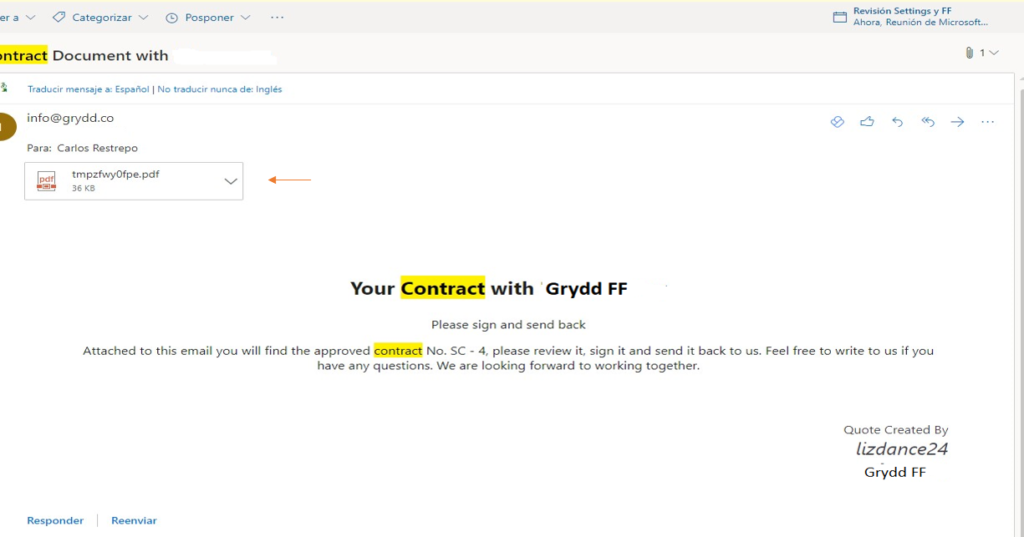
The user will receive an email with their respective contract in pdf format.
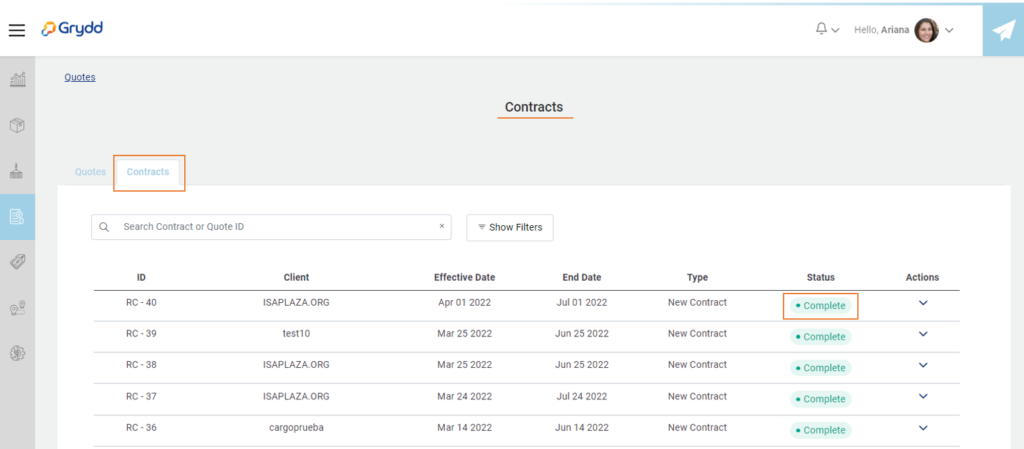
The user enters to upload the contract by selecting the “Upload Signed contract“ button and then clicks on “save” and the status will change to “Complete”.

Now you can see your contract completed in the Contracts tab.
Have questions? Please get in touch via chat. We reply usually within minutes.
Grydd – Fast forward your logistics
Leave a Reply
You must be logged in to post a comment.